Pexip app for Windows user guide
The Pexip app for Windows is an installable software client that provides access to Pexip Infinity conferencing services, allowing users to join conferences and make calls. It is currently supported on Microsoft Windows 10 or later.
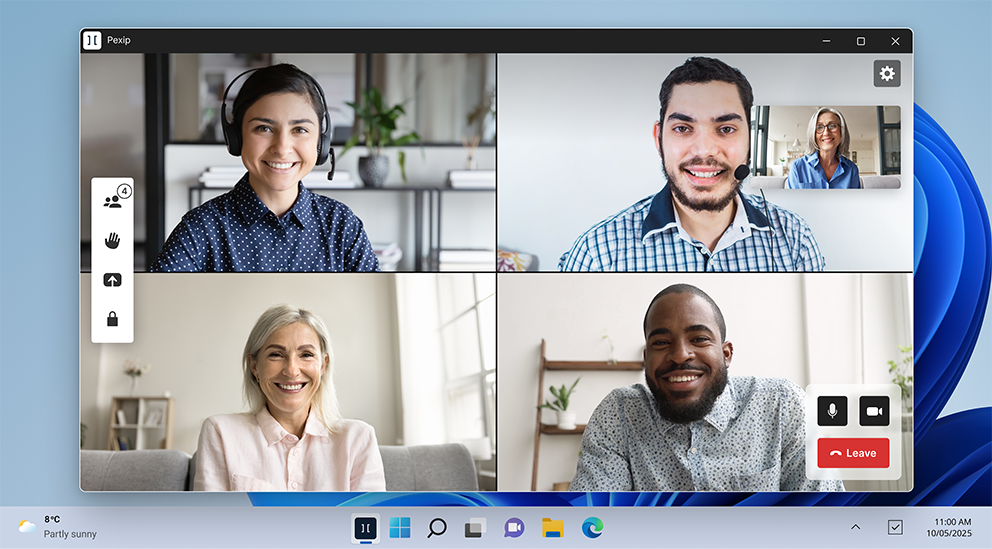
In-meeting experience on the Pexip app for Windows.
Hardware requirements
The performance of the app typically depends on a combination of factors such as the other applications that are currently running on the device, and the device's GPU and CPU specifications.
We recommend that your client device has a minimum of 8 GB of RAM in addition to that required by other applications.
For advanced information about hardware requirements, see Pexip app for Windows planning and prerequisites.
Prerequisites
- Pexip app users who want to join meetings must be part of an organization that has a Pexip meeting solution.
- Microsoft Windows 10 or later.
32-bit operating systems are not supported with the Pexip app for Windows.
Installing
To install the Pexip app for Windows:
- Go to www.pexip.com/help-center/app-download and from the Pexip Secure Meetings section, download Pexip app for Windows.
- Open the downloaded file in your browser to start the installer.
-
Select .
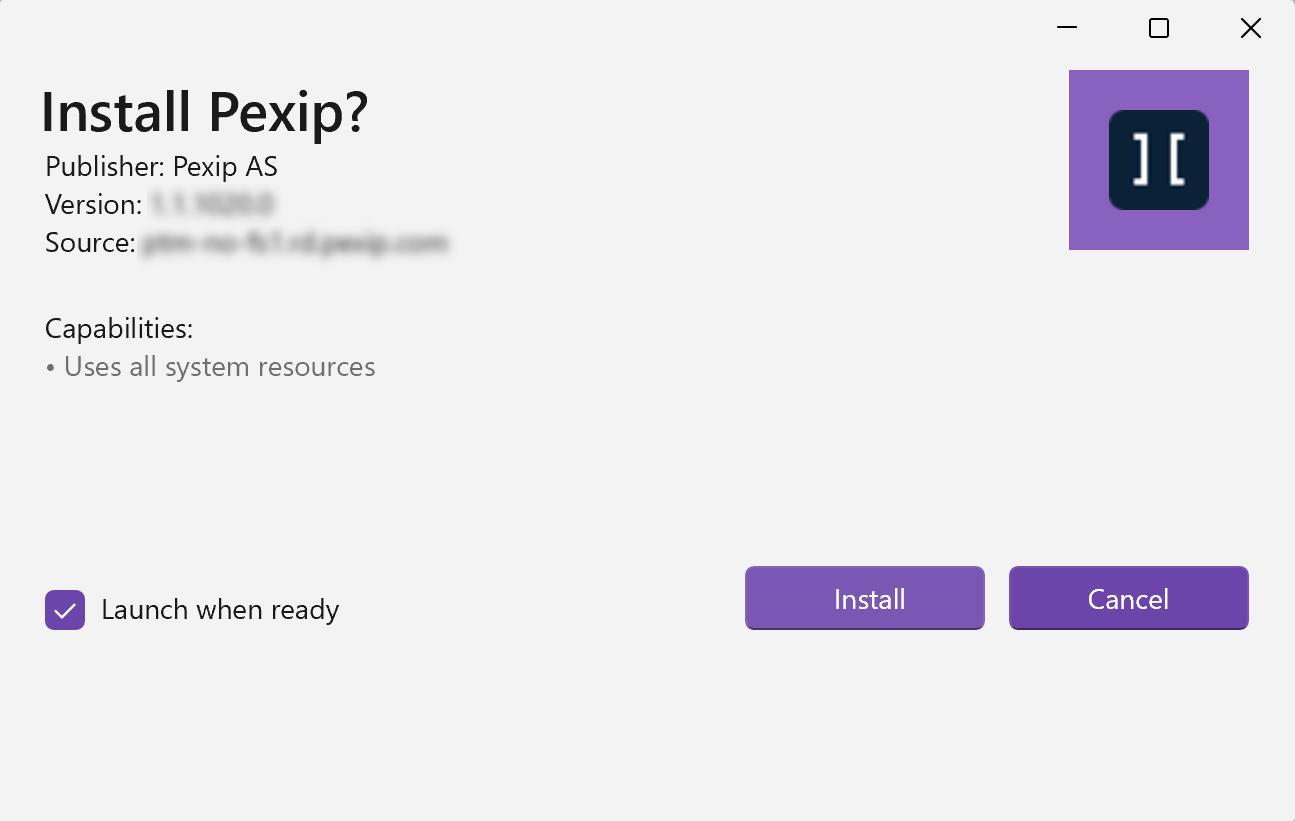
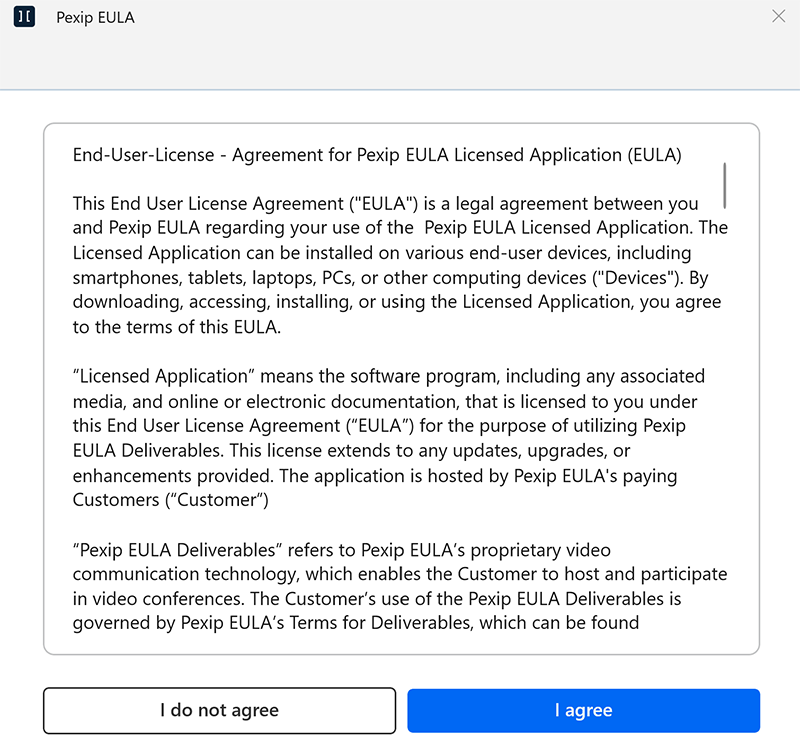
When the app is installed, the End-User License Agreement opens.
-
Select , if you agree with the End-User License Agreement.
-
Enter your video address and select to register your app. Your video address (alias) can be found in the provisioning email sent to you which contains your app and registration settings. Registering your app allows you to use your organization's directory to easily find other people and meeting rooms in your organization.
Your video address is verified via the authentication method set up by your admin. A new window or browser tab may appear during the authentication process. Follow the authentication provider's instructions if this happens. When authentication is complete, you may be asked to reopen the Pexip app for Windows.

- Select to complete the registration and installation.
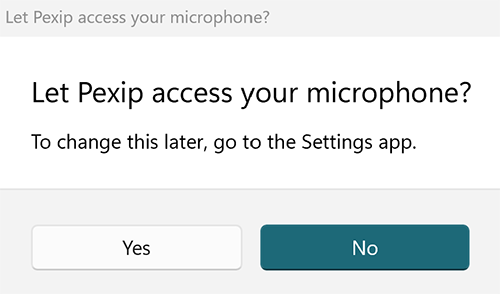
Camera and microphone permissions
The first time you make a call or go to your Video and sound settings, the app will request access to your camera and microphone. To hear and see people in video calls, and to be able to configure your video and sound settings, select Yes.
Using the Pexip app for Windows
Making a call
To make outbound calls, join meetings, or to join your personal Virtual Meeting Room, you have three options: Search, Recent and Favorites.
Search
Use the Search bar in the app to enter the name of a person or meeting room in your organization. The directory will display all relevant results, including other app users, different types of video endpoints, personal Virtual Meeting Rooms and scheduled Virtual Meeting Rooms:
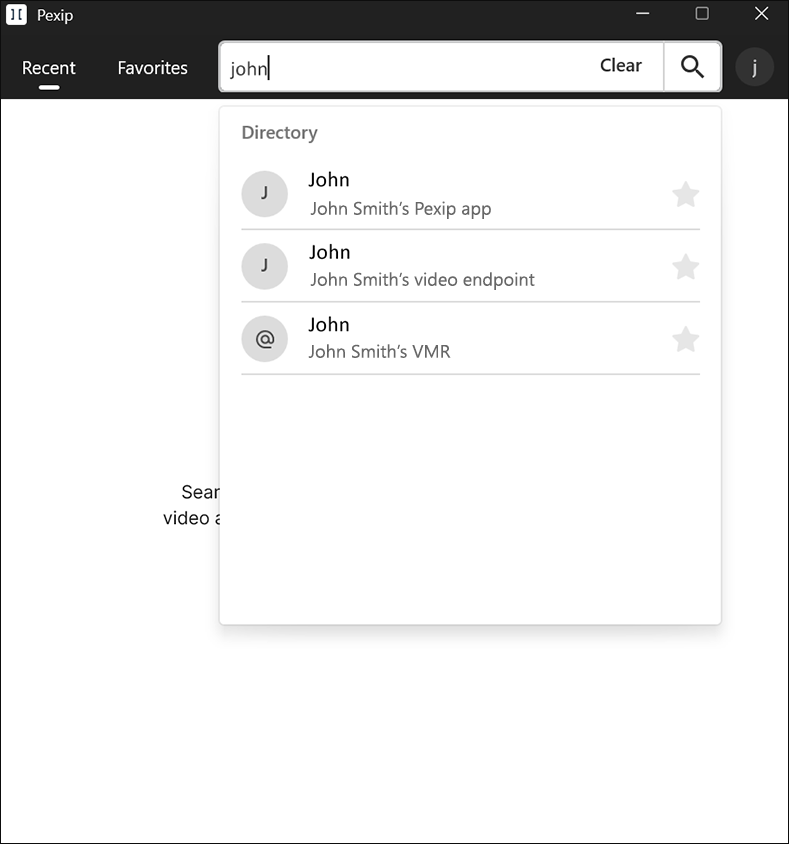
If the person, room, or scheduled meeting is not in your directory, you must manually enter the video address and either press enter or select the icon.
Recent
The Recent menu shows a scrollable list of the most recent calls that you have made and received. Select any recent call to redial this address.
Favorites
The Favorites menu helps you find your most frequent contacts. You can add a contact to your Favorites list by selecting the star next to their name. You can remove the favorite status at any time by selecting the star again.
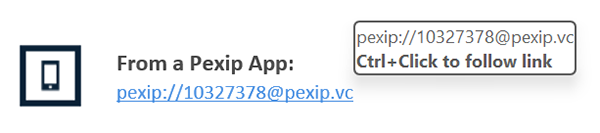
Joining a call from a meeting invitation
If you have received an invitation to a scheduled meeting, you can join the meeting via the Pexip app by selecting the link under From a Pexip app. You may need to select Ctrl and then click to launch the app.
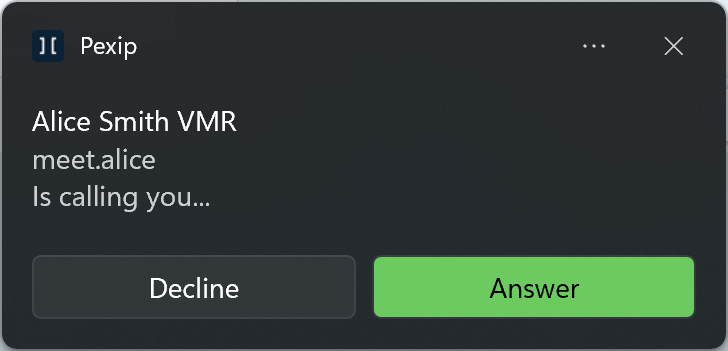
Receiving an incoming call
If you have installed the app and are successfully registered, you can receive incoming calls in the app. You will see a Windows notification like the example below, which you can choose to or . Selecting the notification itself will open the app in the foreground and the incoming call will continue. Within the app, you must then choose to or :
Checking your camera before joining
No matter which of the above methods you use (making a call yourself, joining from a link, or answering an incoming call), before you finally join the call you get the chance to check and change your camera, speakers and microphone:
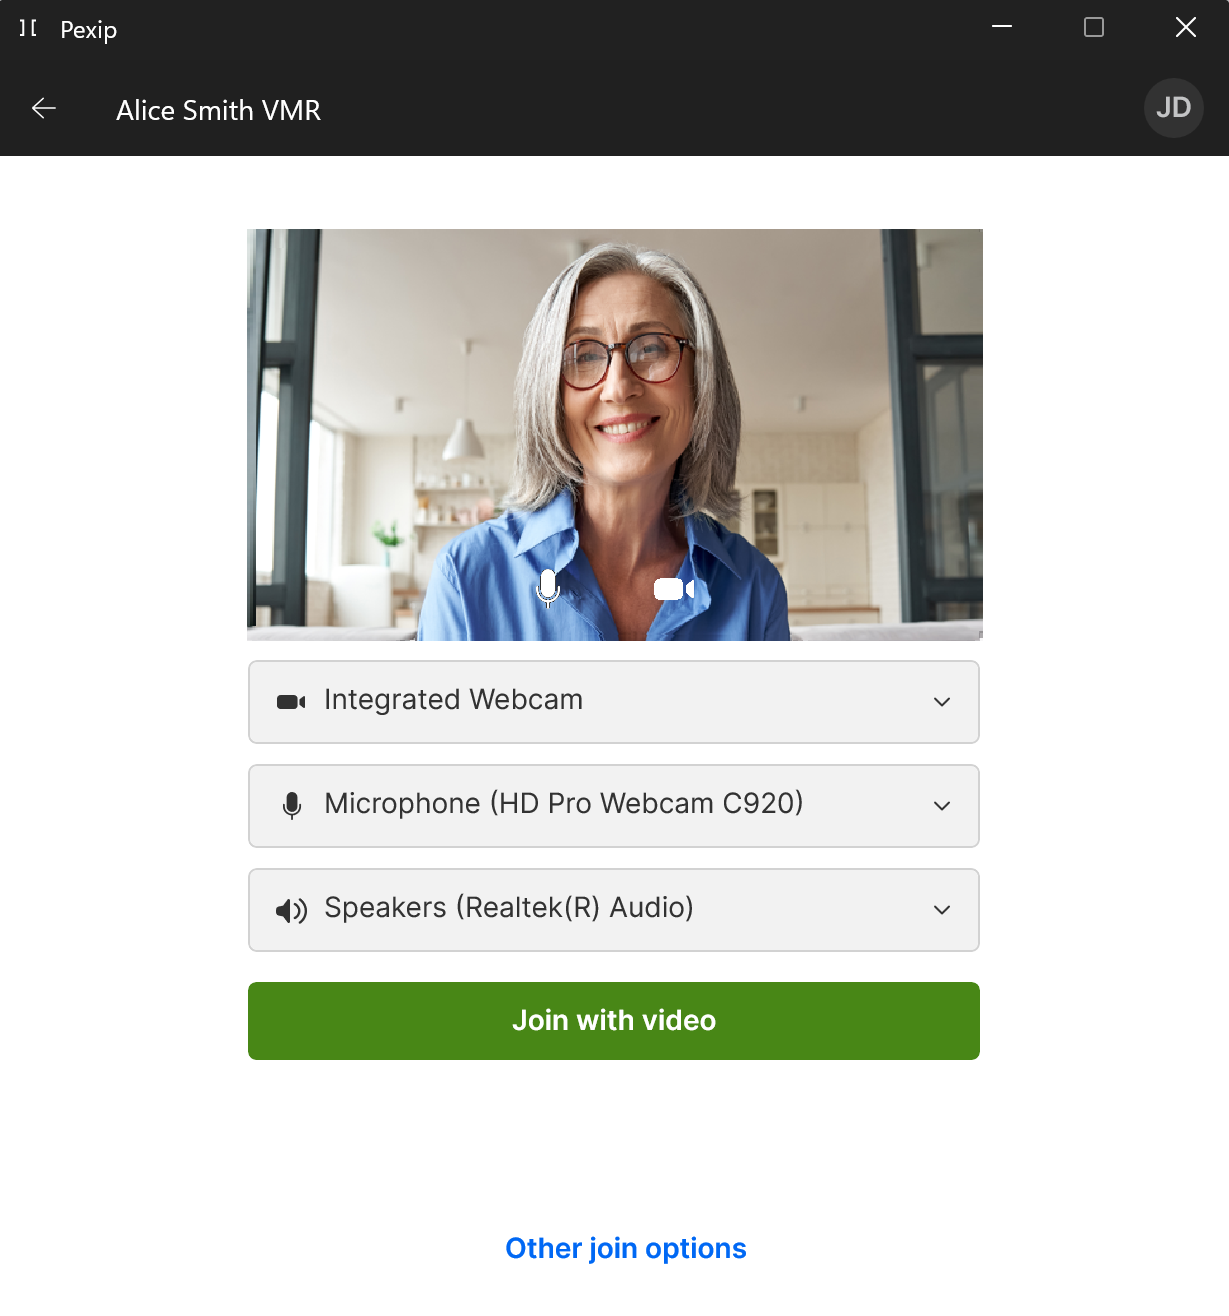
You can also select to join with audio only, or as a presentation-only participant.
Settings
To open your app settings, select your profile icon in the top right-hand corner and select Settings. An overview of the different settings and preferences are outlined below.
| Setting | Description |
|---|---|
| Video and sound |
Here you can preview and change your camera, microphone, and speakers. Video quality: choose between Low, Medium, High and Very High. You may want to reduce the video quality for a smoother call experience when you are experiencing a slow or unstable internet connection. |
| Joining |
|
| Registration |
Displays the registration details you entered when setting up the app. A registered app allows you to:
Unregistering your app will sign you out of the app entirely and you will not be able to make or receive calls. |
| Language |
Change the language used in the app. You'll need to restart the app for any changes to take effect. |
| Advanced | Choose whether you want the Pexip app to automatically start whenever you start your device. |
| About |
The information displayed in About tells you the app version that you are currently using and the license information. |
| Privacy and analytics | creates local incident files which you can send your admin or support team. Incident reports are useful when trying to understand an expected issue that might happen to your app while you are using it. |
Sharing content
In a meeting, you can share your screen or specific windows with other participants.
-
From the toolbar select Share screen
 .
.The Share content window appears:
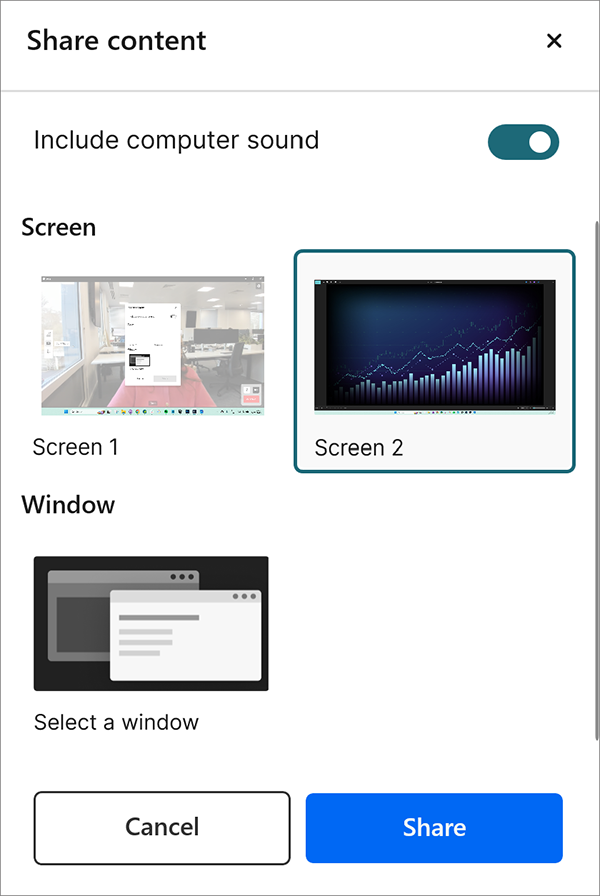
- Select the Screen or Window you want to share.
-
If you also want to share the audio from your computer to the meeting, select Include computer sound.
You must have joined the meeting with audio to be able to share computer sound. Muting your microphone does not also mute shared audio.
- Select Share.
- To stop sharing, from the toolbar select Stop share .