Using AD FS for SSO/SAML access to ERM
ERM can integrate with Active Directory Federation Services (AD FS) to enable single sign-on (SSO) access via SAML.
Prerequisites
You should have deep knowledge about the ERM product, AD FS, DNS, and certificates before enabling SSO/SAML.
Ensure that the following prerequisites are in place/available:
- AD FS Service installed and configured for your organization.
- All certificates and CA root and Intermediary certificates should be installed.
- Hostname / Fully Qualified Domain Name of the AD FS Service and of the ERM module for device management.
- NTP configured and in sync.
Configuring ERM for SAML/SSO
You must configure all the settings needed by ERM:
- In the installer go to .
-
Complete the settings:
Name Description Entity URI to pass to SAML server Typically the URL for the product i.e. the FQDN for ERM.
Example: https://erm.pexample.com
URL to autoconfig metadata XML-file Enter: https://<ADFS FQDN>/FederationMetadata/2007-06/FederationMetadata.xml
If you don’t have access to the IDP Metadata URL, you can paste the Metadata in Offline idP metadata XML instead.
Select existing certificate Select the certificate to use to sign the SAML requests. Username claim The claim used as the username. Group/role/memberOf SAML claim The claim used to match User role, Administrator role and Superuser role. Group/role claim value required for regular users The value returning from the Group/role/memberOf SAML claim above, for regular users. Group/role claim value required for admin-users The value returning from the Group/role/memberOf SAML claim above, for admin users. Group/role claim value required for superuser-users The value returning from the Group/role/memberOf SAML claim above, for superuser users. Customer SAML claim Leave blank. Enable single log out (SLO) Select this option to enable SAML logout. Enable local accounts Select this option to allow logging in to backend admin or API using username and password. Enable debug-mode Select this to include more logging information to assist with troubleshooting. - your changes.
- From the main installer page, your changes.
Configuring Microsoft AD FS and the Relying Party Trust
You have to configure Microsoft AD FS and the Relying Party Trust:
-
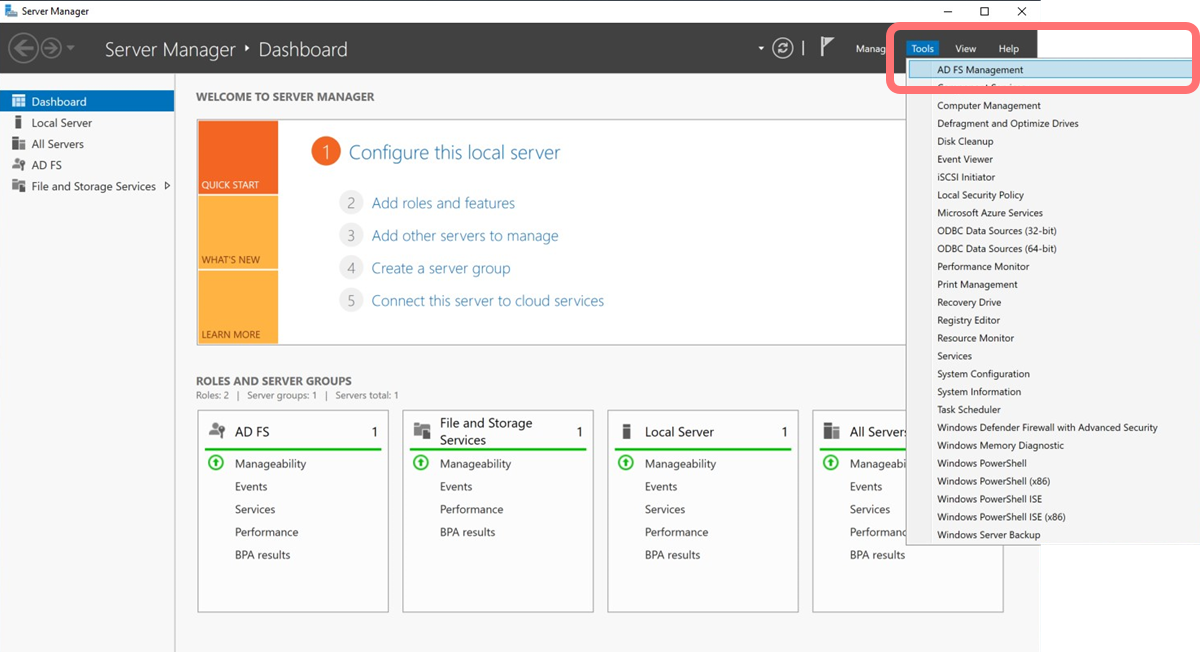
From the AD FS server, open the Server Manager application. From the top right, select :
-
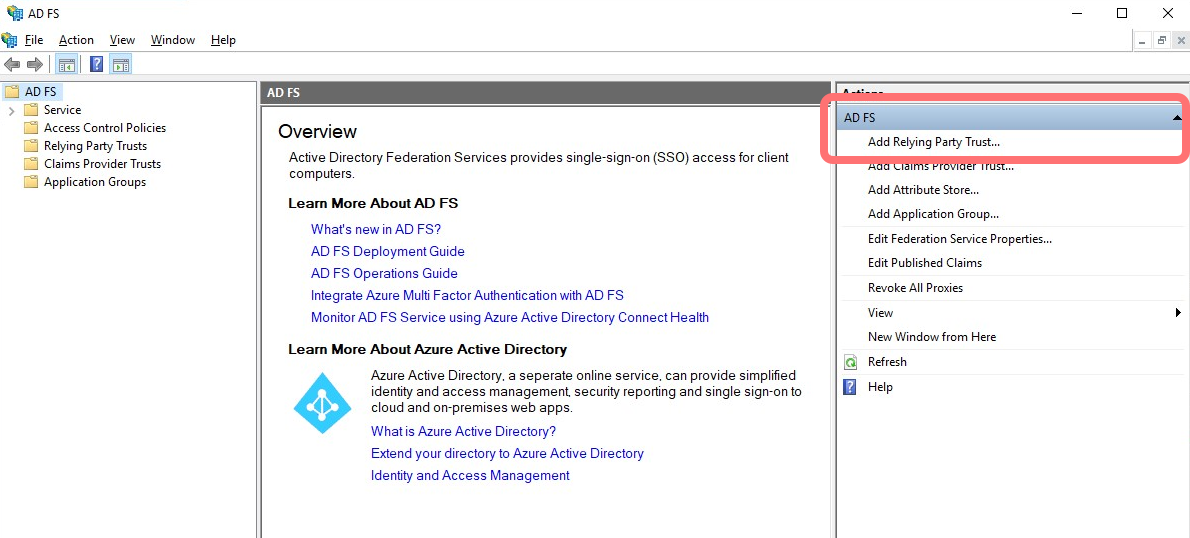
From the Actions panel, select :
-
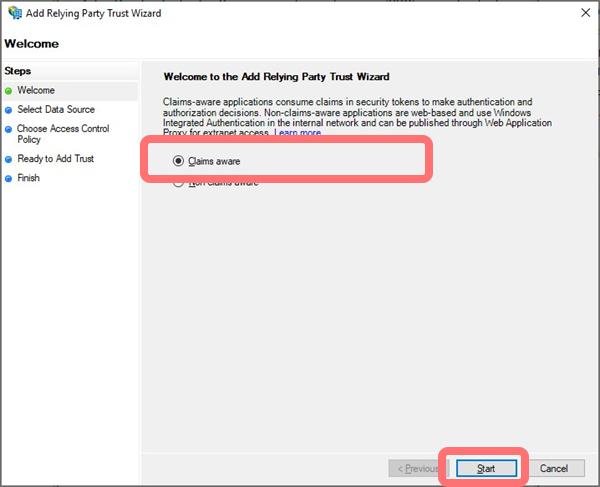
At the Add Relying Party Trust Wizard, select and then :
-
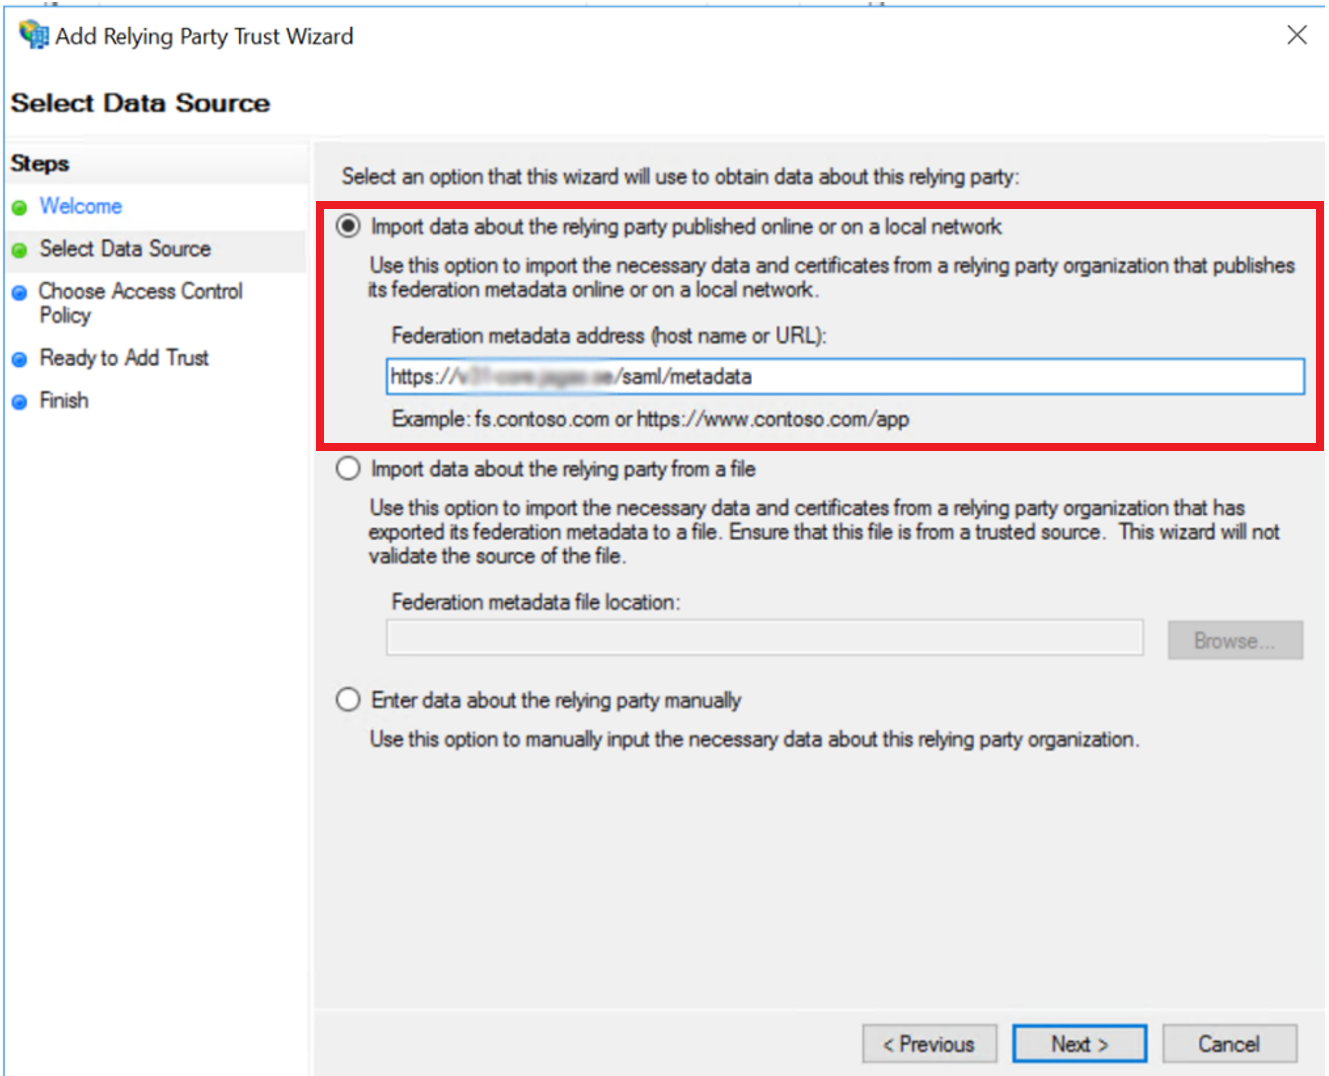
Select Import data about the relying party published online or on a local network and enter the following URL in the field:
https://<FQDN of ERM>/saml/metadata
(replacing <FQDN of ERM> with the actual FQDN of your ERM module)
and select .
-
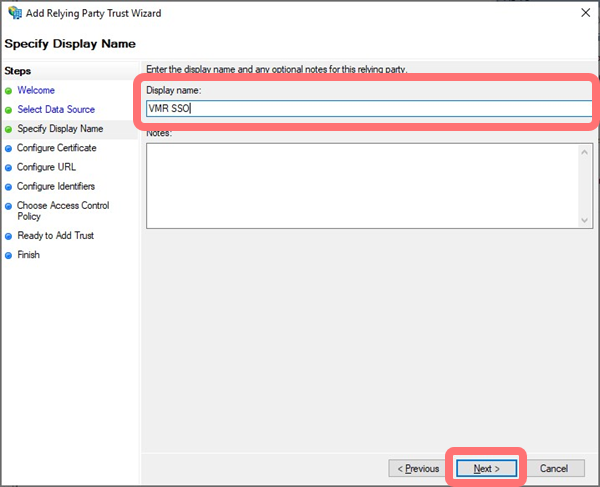
Enter a display name for your own reference, and select :
-
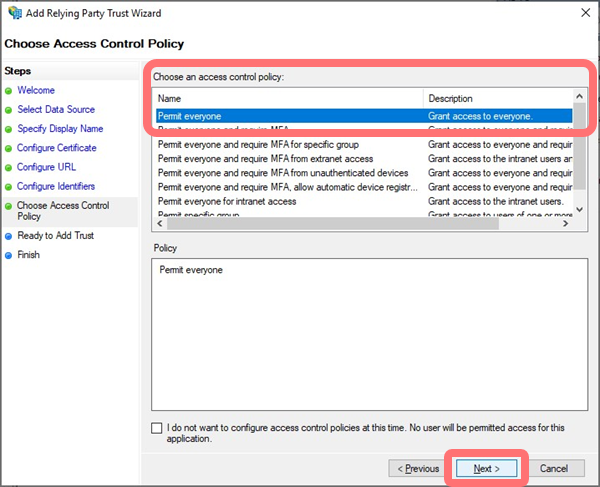
Set the Access Control Policy as required for your environment to limit this configuration to users in specific groups or with specific authentication methods, and select .
- On the next page you can verify your configuration and when done, click .
-
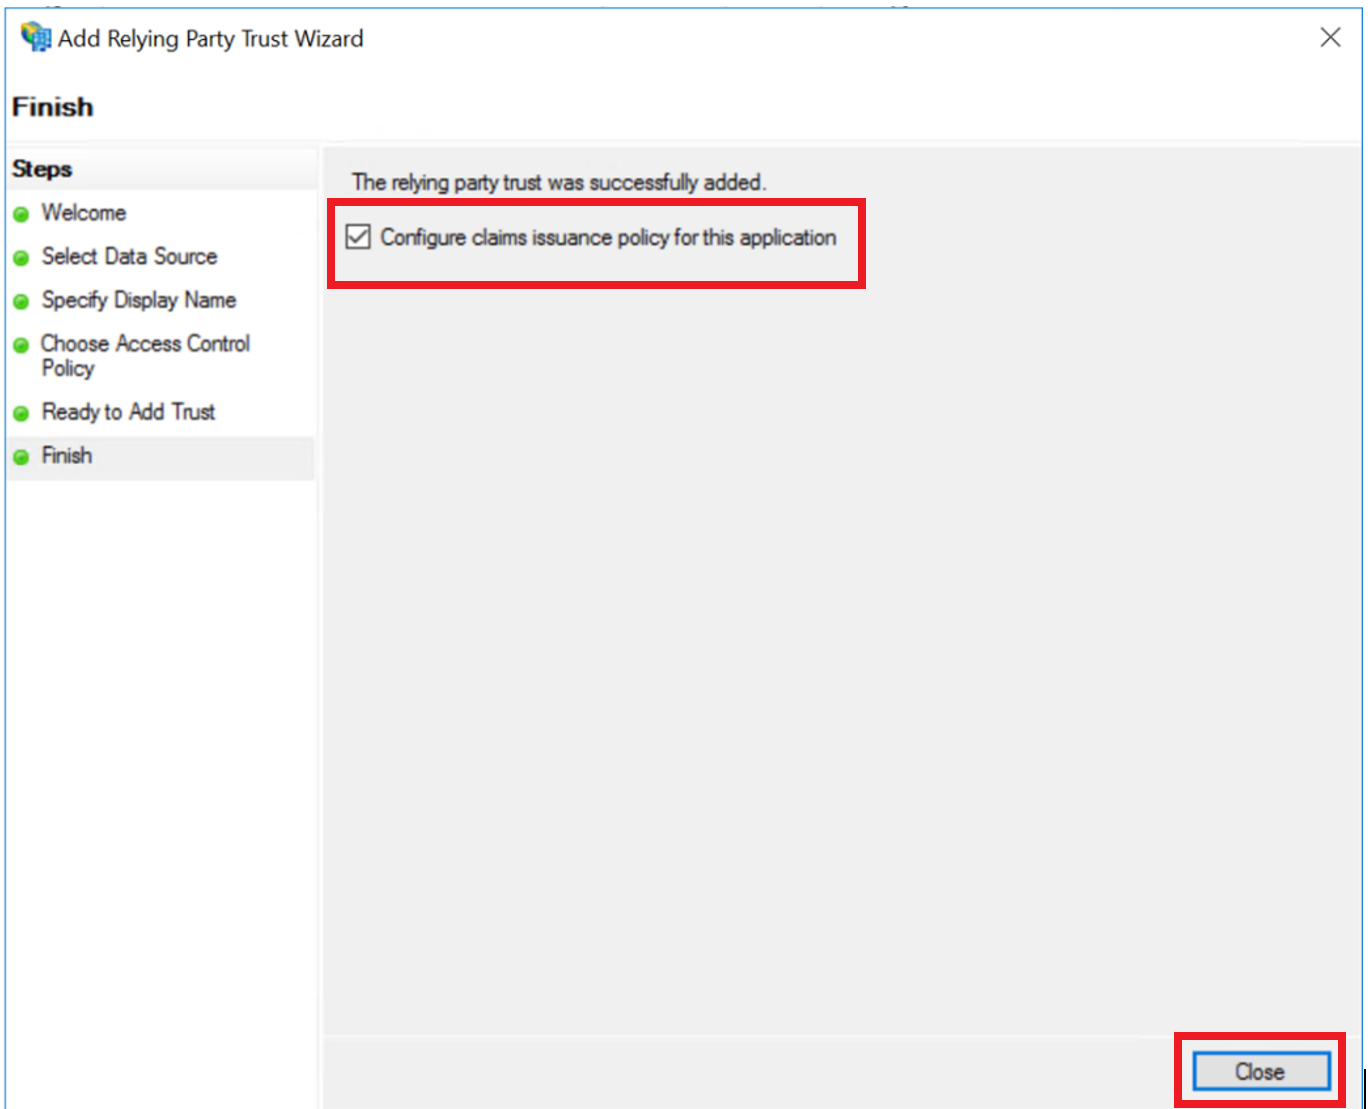
On the page, select Configure claims issuance policy for this application and select .
-
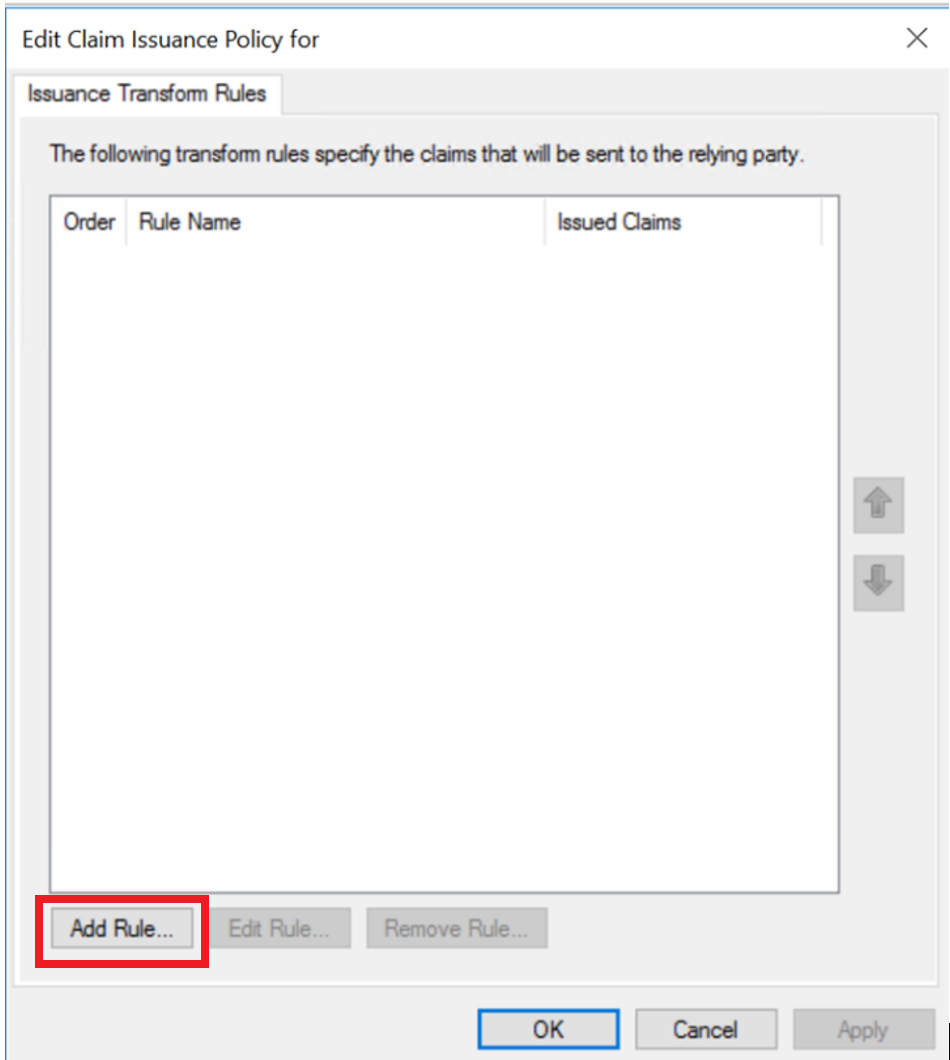
A claims configuration window opens where you can define issuance transform rules. Select .
-
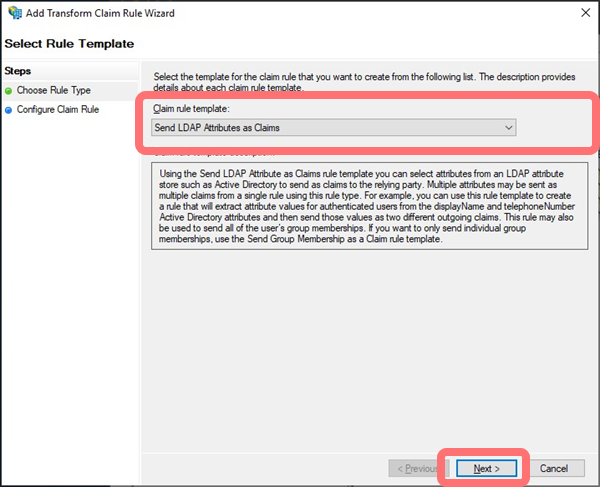
Select a Claim rule template of Send LDAP Attributes as Claims:
-
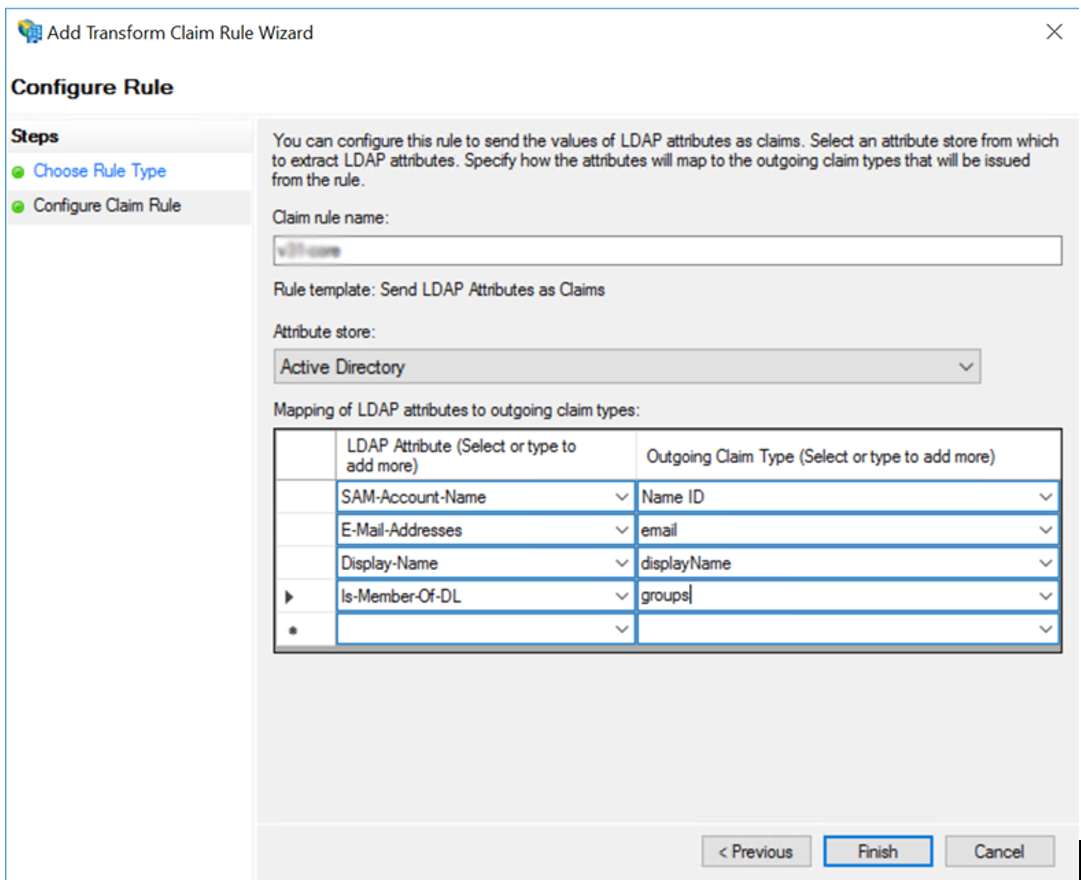
Enter a name for your own reference. From the Attribute store option, select Active Directory. From the lists that then appear, map the following attributes to claim types:
- SAM-Account-Name > Name ID
- E-Mail-Addresses > email
- Display-Name > displayName
- Is-Member-Of-DL > groups
-
Select .
This completes your SSO/SAML configuration.
Disabling SSO/SAML
To disable SAML SSO:
- In the installer go to .
- At the bottom of the page, select the Remove optional setting check box.
- your changes.
- From the main installer page, your changes.