Add-in authentication in multi-tenant environments
This topic explains how to configure add-in authentication for Secure Scheduler for Exchange in multi-tenant environments, such as those managed by a service provider. This process uses a single NAA App registration which is used for all tenants' Secure Scheduler for Exchange Integrations.
Differences for multi-tenant environments
The process is similar to that for single-tenant environments, as described in NAA (Nested App Authentication) token authentication, but with the following differences:
- When entering details for both the Web API registration and the App registration, for Supported account types you select Accounts in any organizational directory (Any Microsoft Entra ID tenant - Multitenant).
- When configuring the App registration, you enter multiple Redirect URIs — one for each Add-in server FQDN used in your environment across all Secure Scheduler for Exchange Integrations.
- When configuring the Secure Scheduler for Exchange Integration for each tenant:
the Add-in auth authority URL is the multi-tenant Authority URL, copied from the "Endpoints" page on the NAA App registration. This is the same for all tenants.
the Add-in auth OIDC Metadata URL is tenant-specific. It includes the tenant ID and is in the format:
https://login.microsoftonline.com/{tenant_id}/v2.0/.well-known/openid-configuration
For ease of reference, the full instructions including the changes above are repeated below.
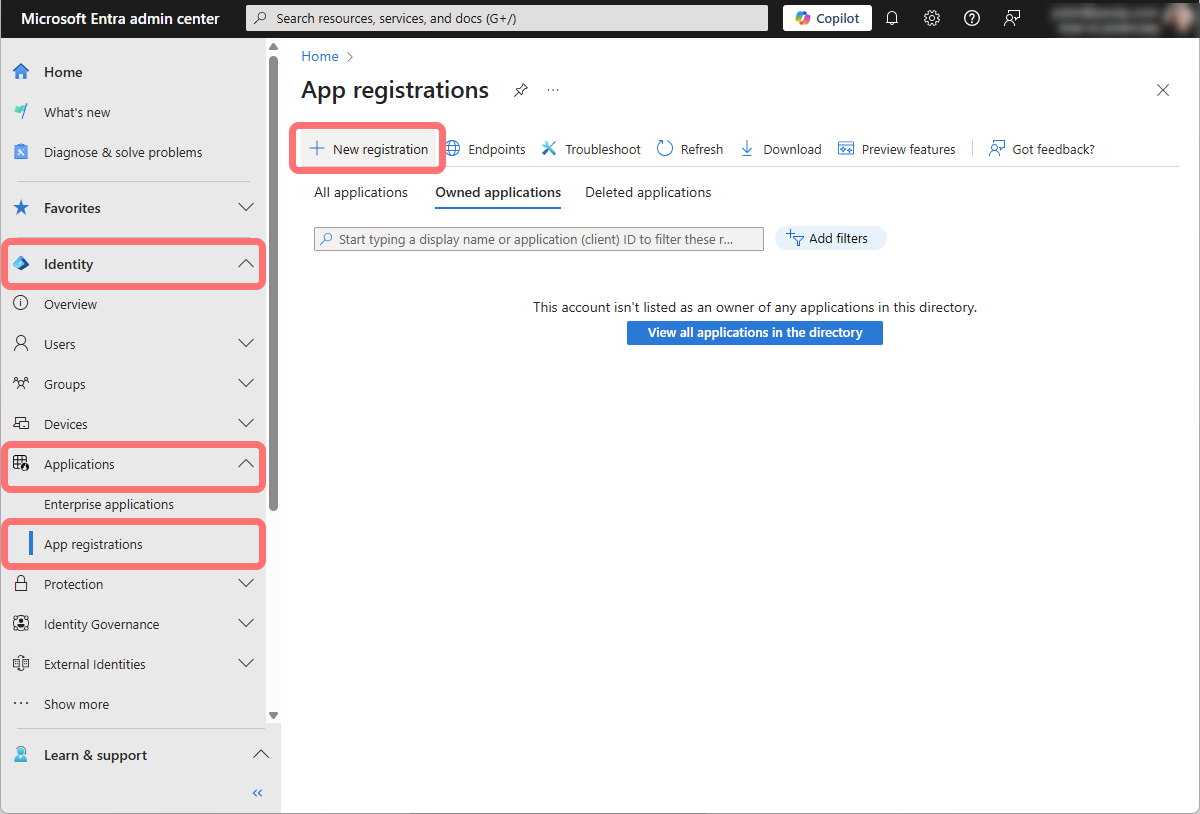
Creating a Web API registration
- Go to https://entra.microsoft.com/ and log in as an administrator.
-
From the left hand panel, select and from the main window select :
-
Enter details for the new registration, as follows:
- Name: in our example we have used Pexip Scheduling NAA Web API.
- Supported account types: you must select Accounts in any organizational directory (Any Microsoft Entra ID tenant - Multitenant)
- Redirect URI: leave blank.
- Select.
-
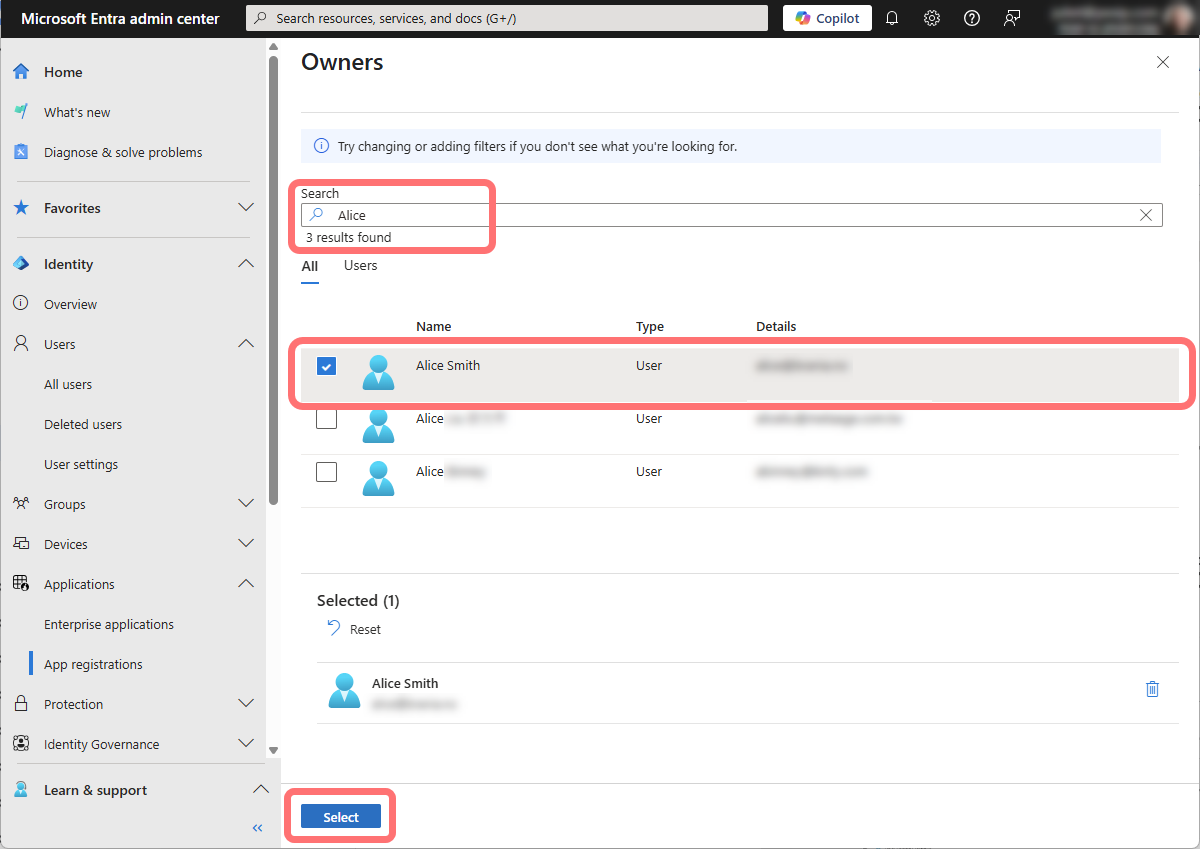
Select :

Adding an owner is optional. We recommend adding yourself as an owner because it makes it easier to find the app registration in later steps. You can add additional users as owners at any point.
-
Search for your own user. Tick the box next to your user, and then select :
-
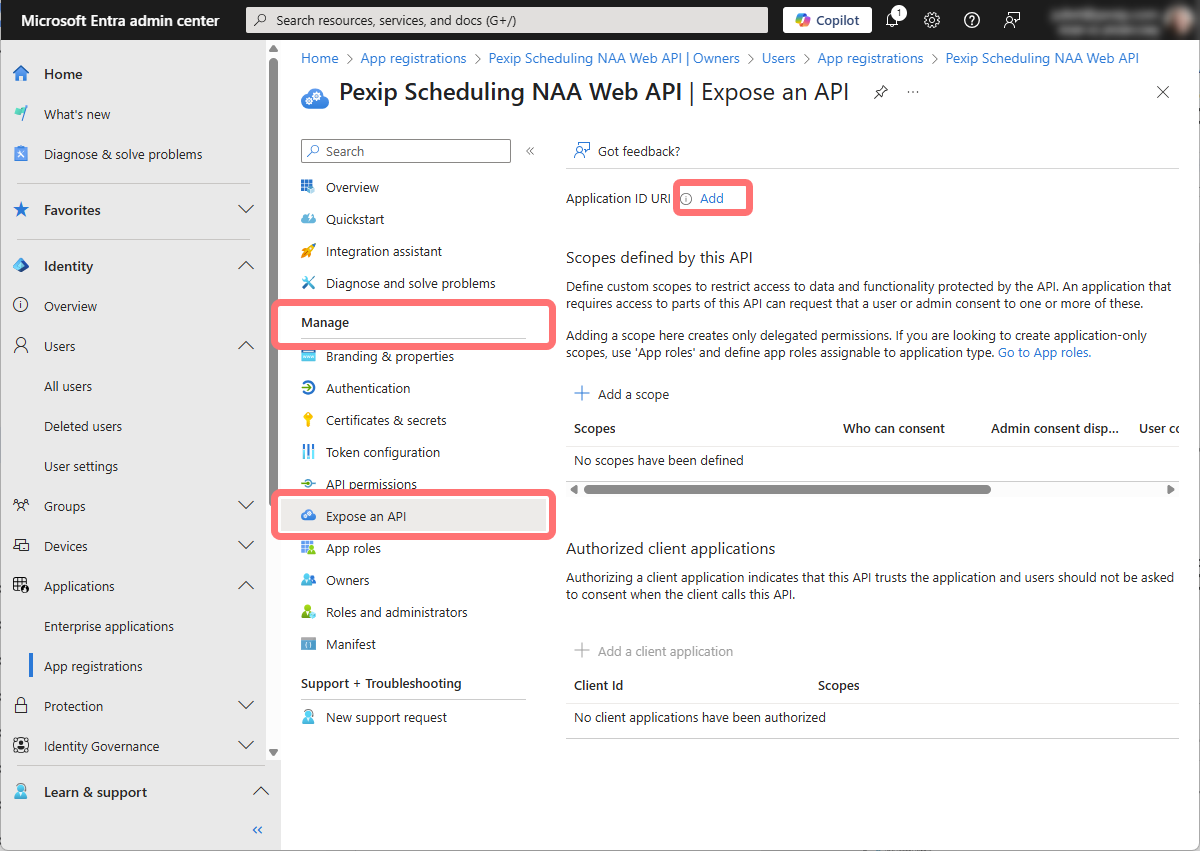
Select . Next to Application ID URI, select Add:
-
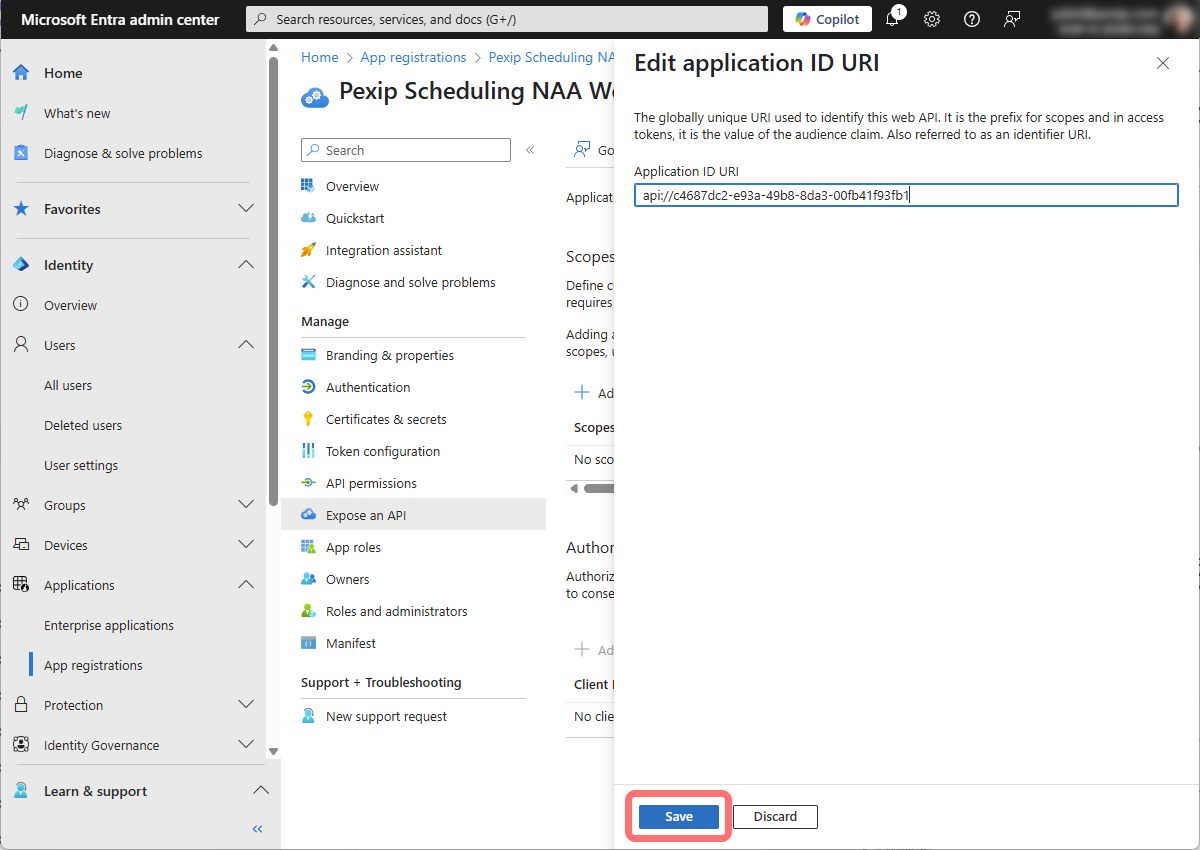
the automatically generated Application ID URI. Do not edit it:
-
Select :
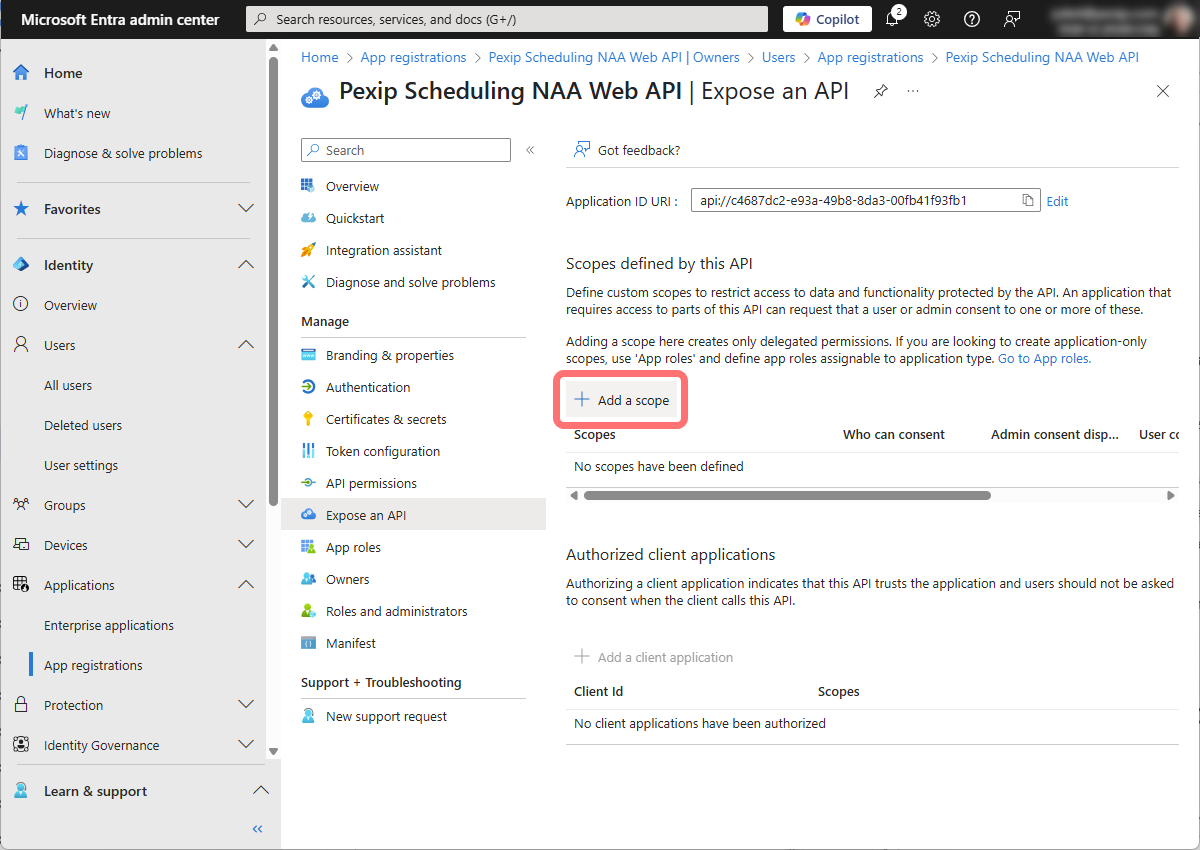
-
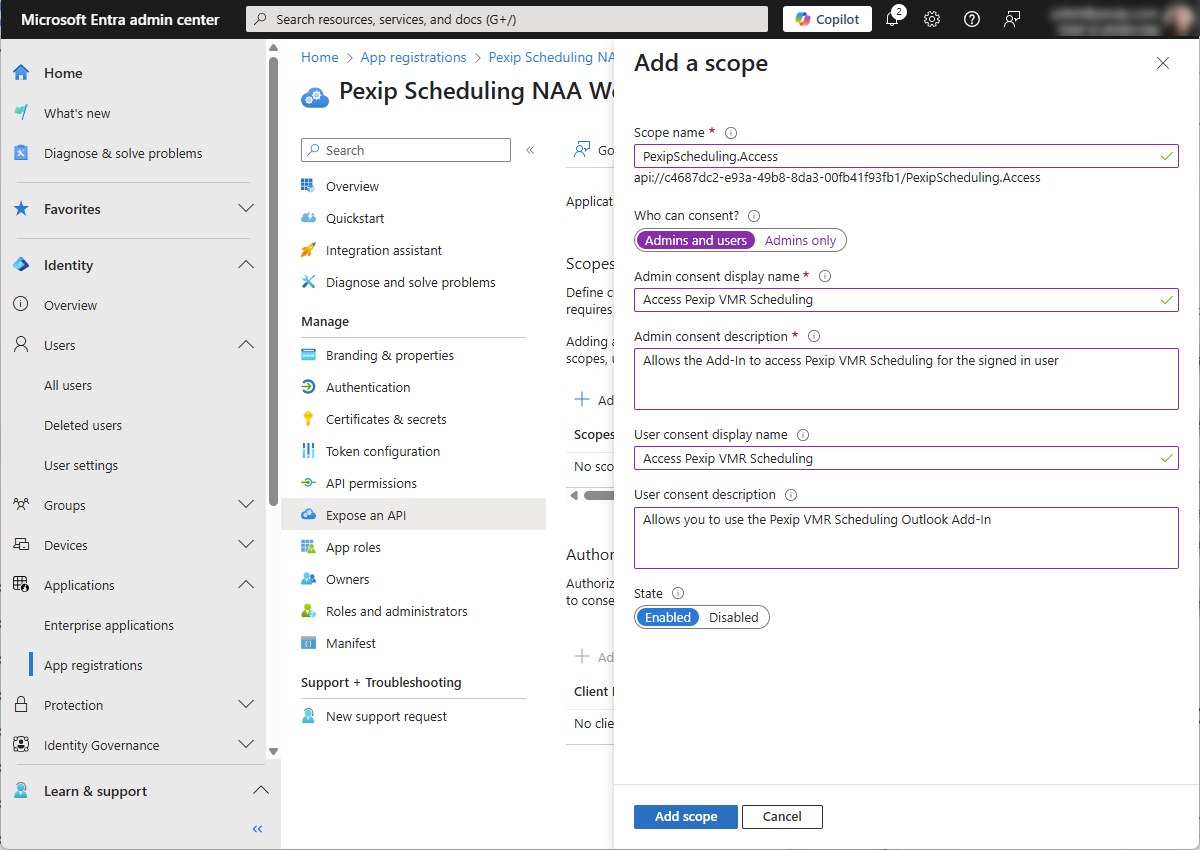
Enter the following:
-
Scope name: enter PexipScheduling.Access — you must use this value, do not modify it.
-
Who can consent?: select Admins and users.
-
Admin consent display name: we recommend a descriptive name such as Access Pexip VMR Scheduling.
-
Admin consent description: we recommend something descriptive such as Allows the add-in to access Pexip VMR Scheduling for the signed in user.
-
User consent display name: we recommend you use a descriptive name such as Access Pexip VMR Scheduling.
-
User consent description: we recommend something descriptive such as Allows you to use the Pexip VMR Scheduling Outlook add-in.
-
State: must be Enabled.
Select :
-
Enabling Version 2.0 access tokens
Version 1.0 access tokens are issued by default. However, Pexip requires Version 2.0. To enable Version 2.0 tokens:
-
Select . In the Microsoft Graph app manifest JSON, find the string
requestedAccessTokenVersion(you can use your web browser's search function to locate it).By default, it is set to a value of
null: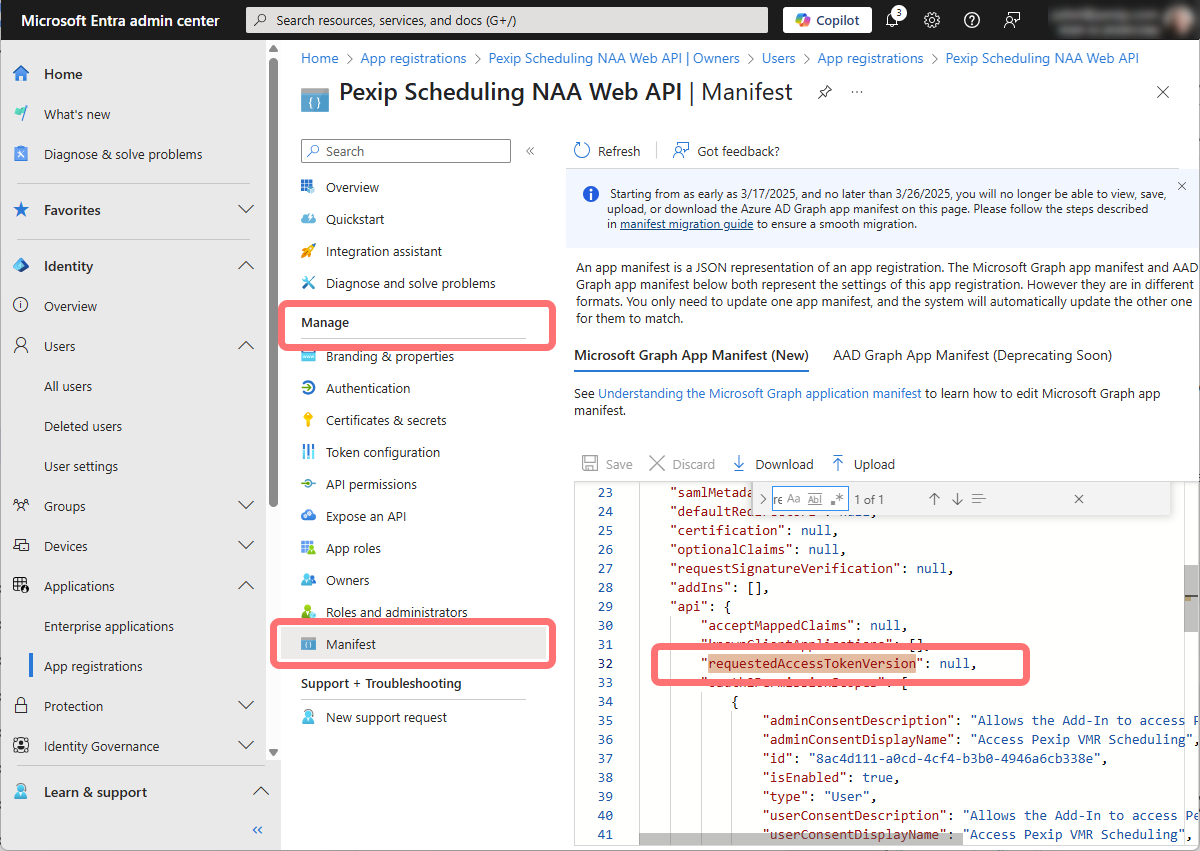
-
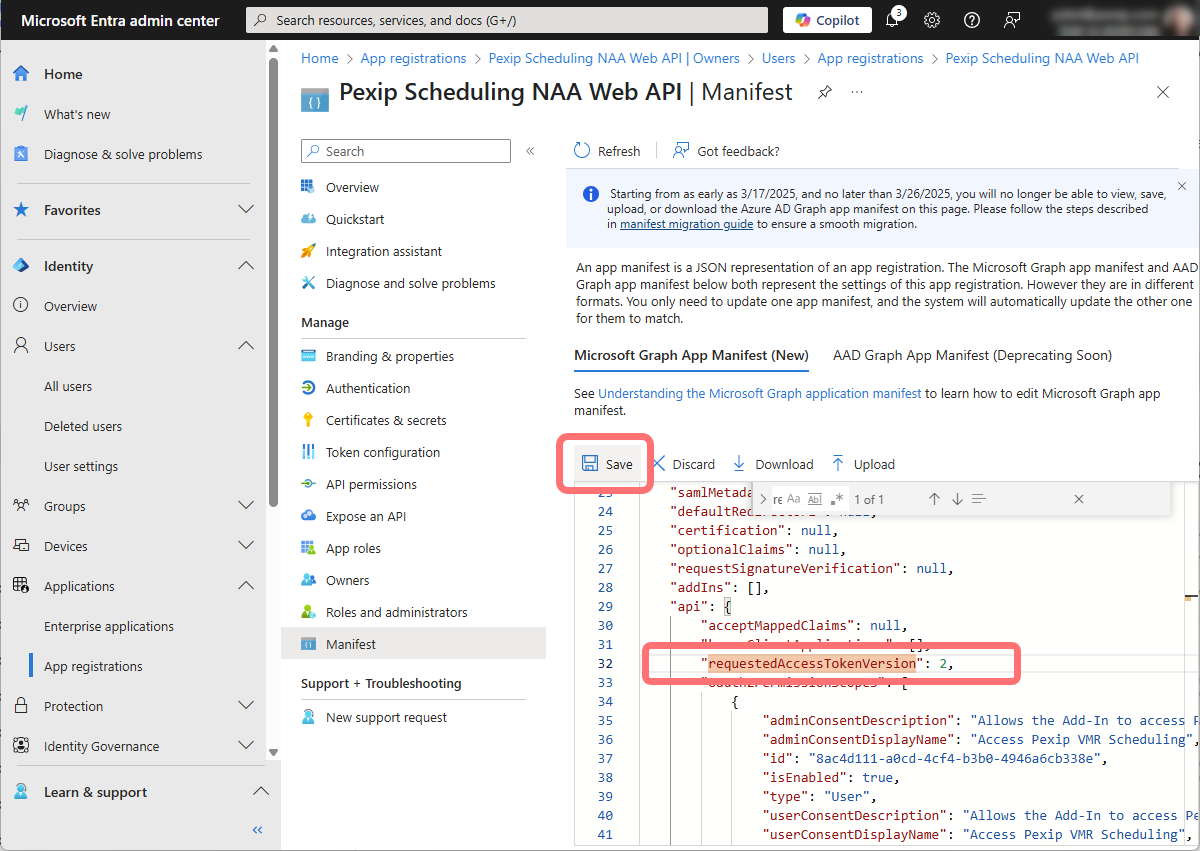
Replace
nullwith the value2, so it looks like this:"requestedAccessTokenVersion": 2,Select :
Creating the NAA App
- Go to https://entra.microsoft.com/ and log in as an administrator.
-
From the left hand panel, select and from the main window select .
-
Enter details for the new registration, as follows:
- Name: in our example we have used Pexip Scheduling NAA App.
- Supported account types: you must select Accounts in any organizational directory (Any Microsoft Entra ID tenant - Multitenant)
- Redirect URI: leave blank.
- Select.
-
Select :

Adding an owner is optional. We recommend adding yourself as an owner because it makes it easier to find the app registration in later steps. You can add additional users as owners at any point.
-
Search for your own user. Tick the box next to your user, and then select :
-
From select :
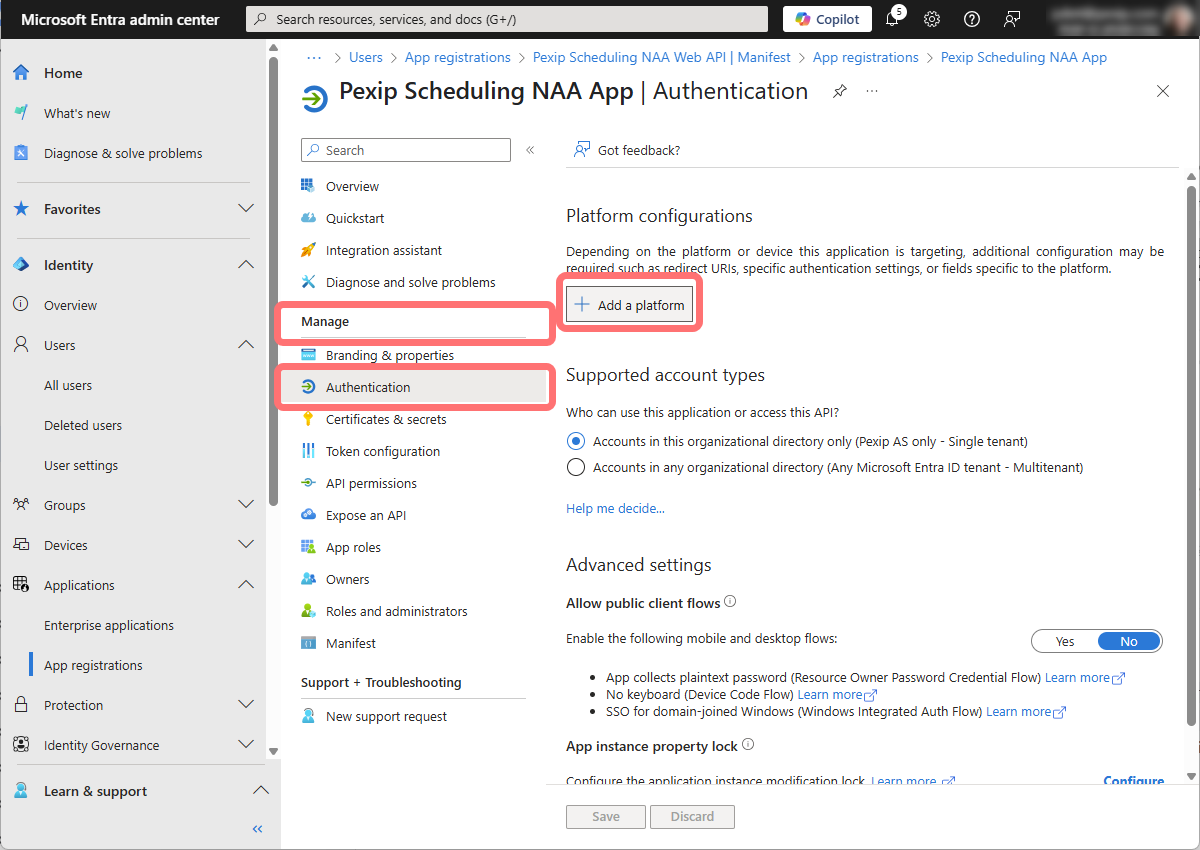
-
Select the Single-page application tile:
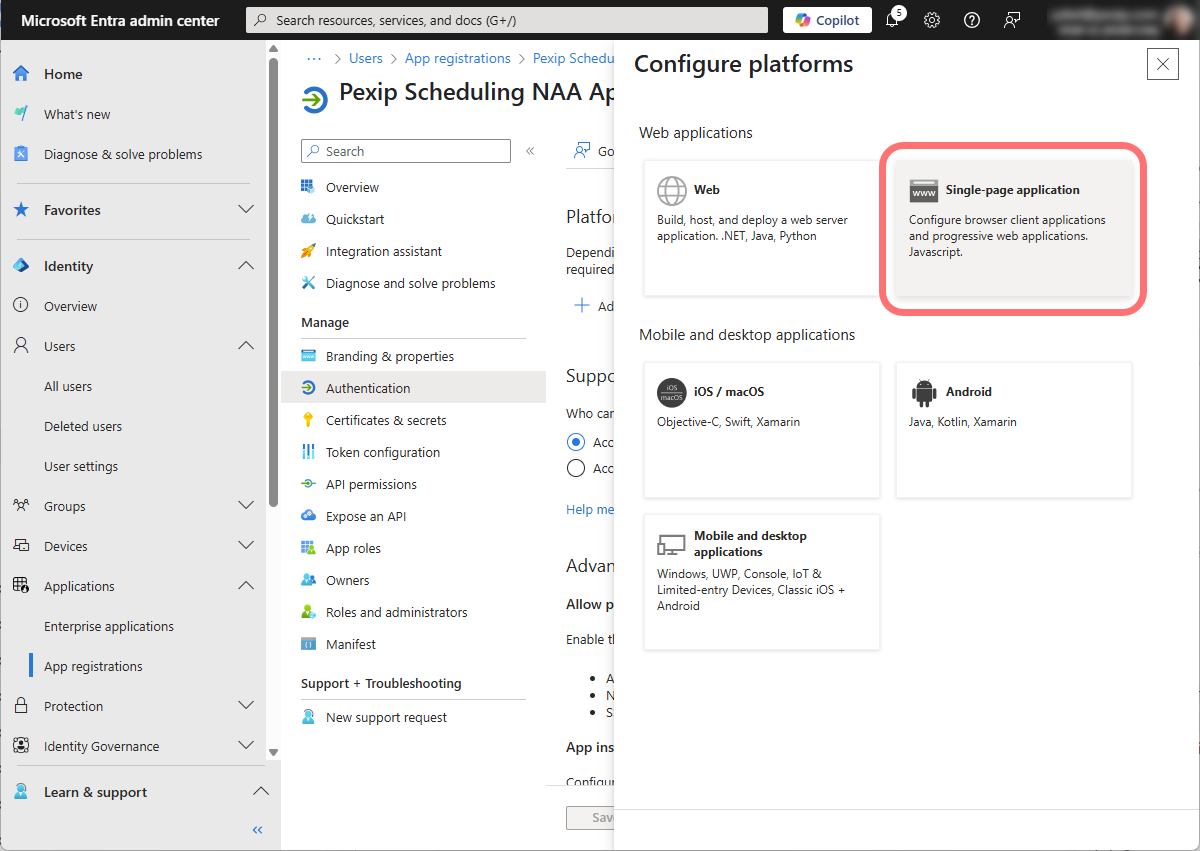
- In the Redirect URIs field, enter a URI in the form: brk-multihub://<add-in server FQDN> where <add-in server FQDN> is one of the Add-in server FQDNs configured on the Management Node for a Secure Scheduler for Exchange Integration.
-
Leave all the other options blank and unchecked, and select :
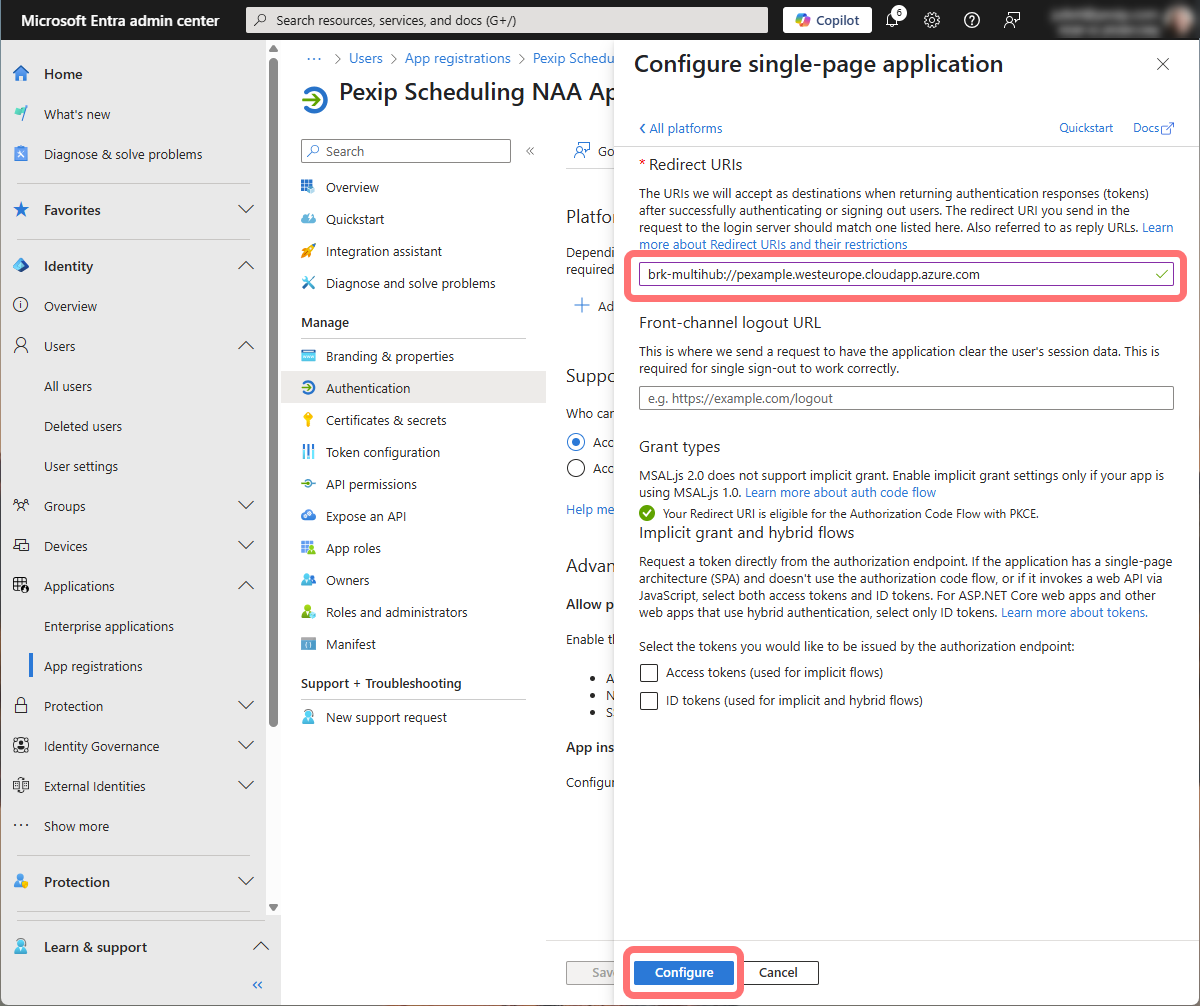
-
From , under the Single-page application section, select . For each remaining Add-in server FQDN configured in your Secure Scheduler for Exchange Integrations, enter a URI in the form: brk-multihub://<add-in server FQDN> where <add-in server FQDN> is the FQDN of the server on which the add-in is hosted.
-
Select :
-
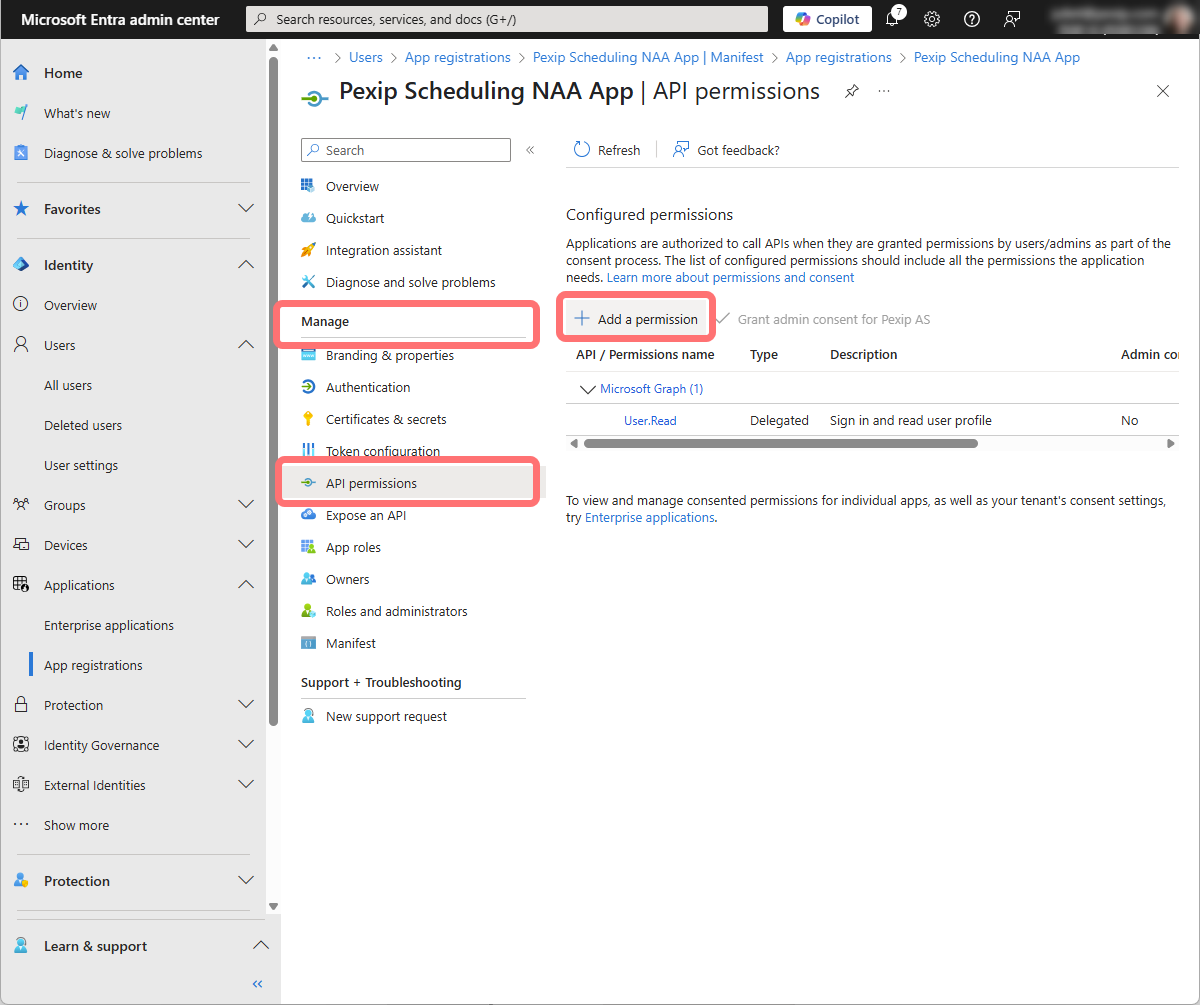
Select the My APIs tab. Find and select the Web API you created in the previous step (in our example, this is named Pexip Scheduling NAA Web API):
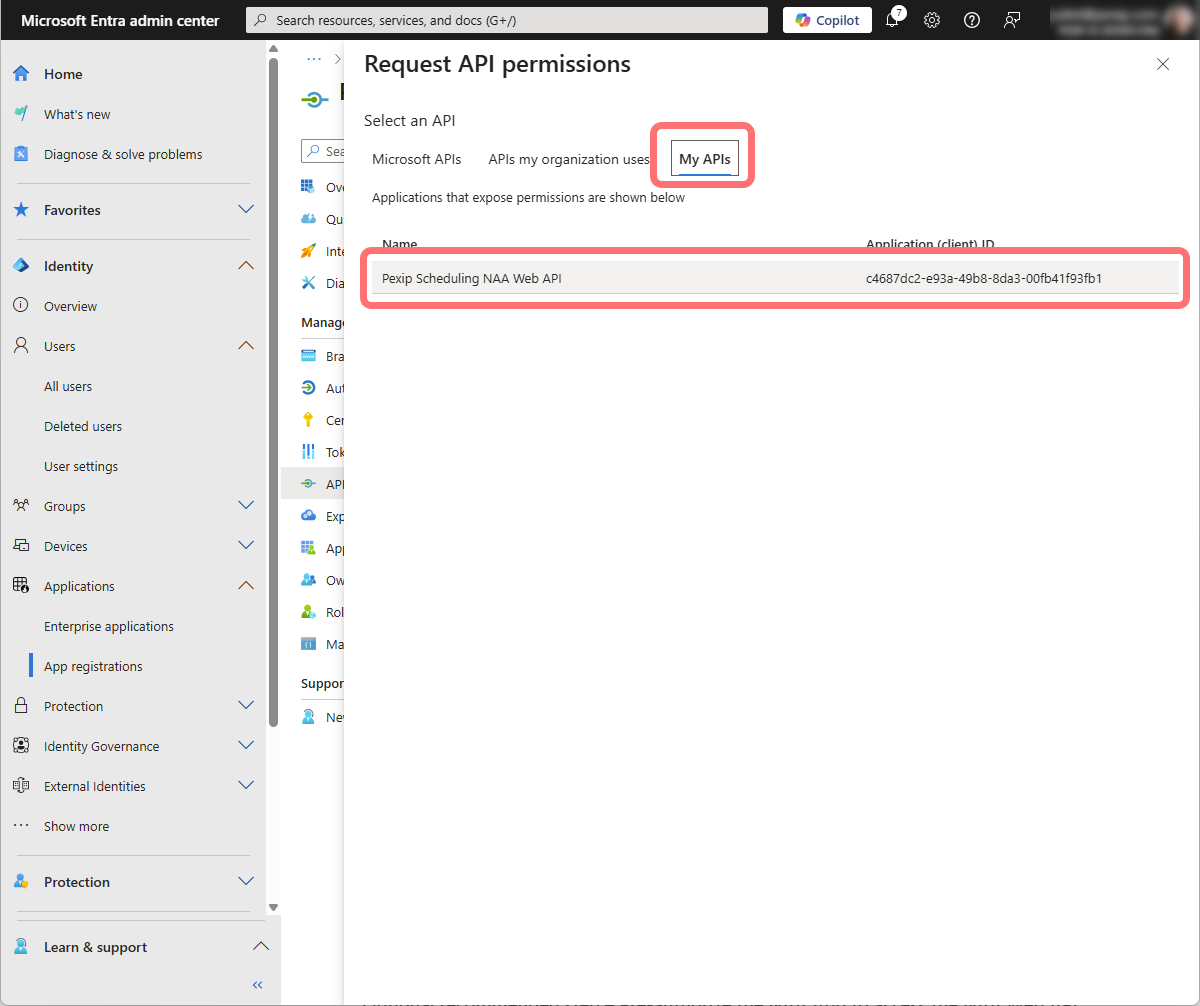
-
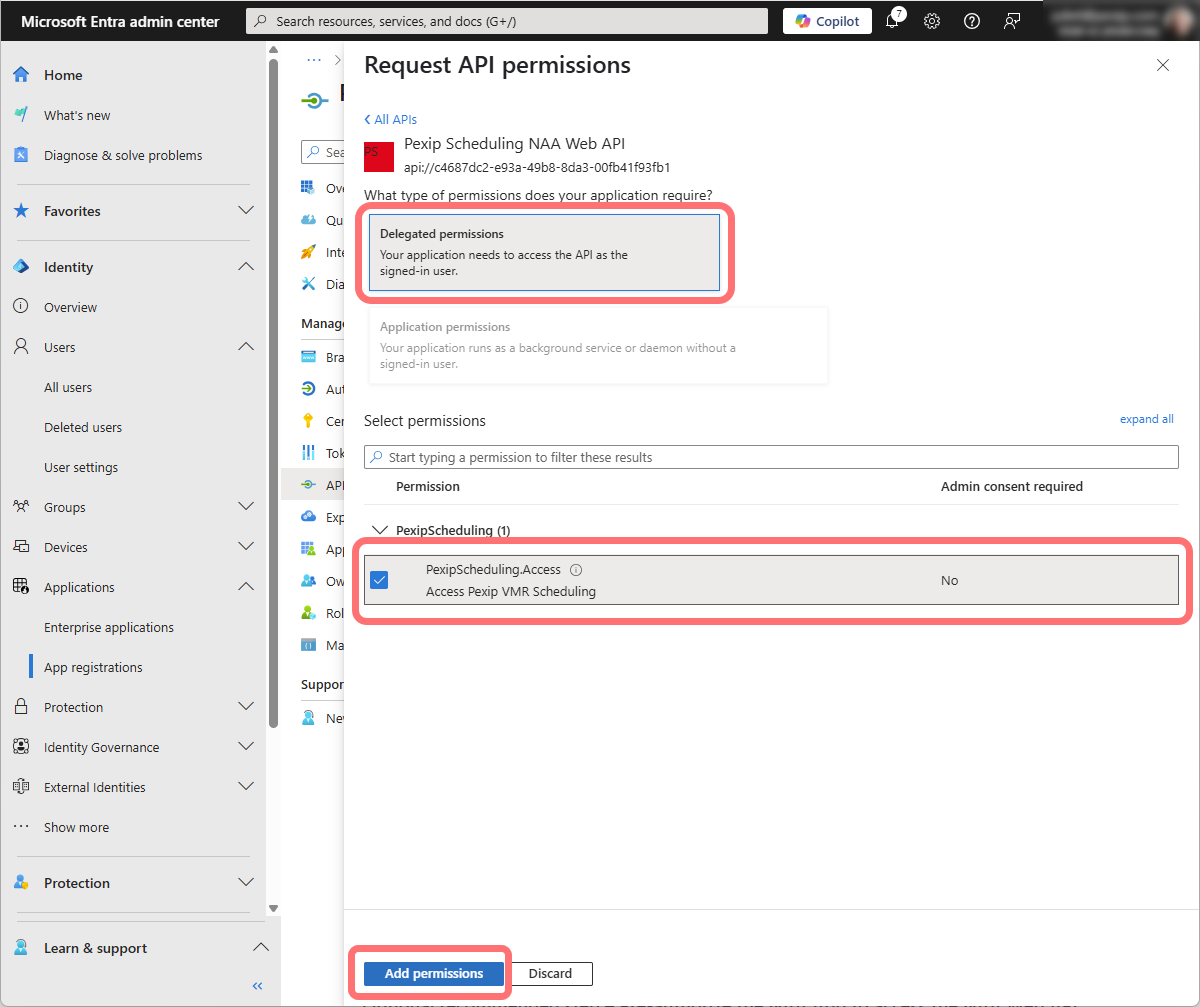
Select and tick the checkbox next to the PexipScheduling.Access permission. Select :
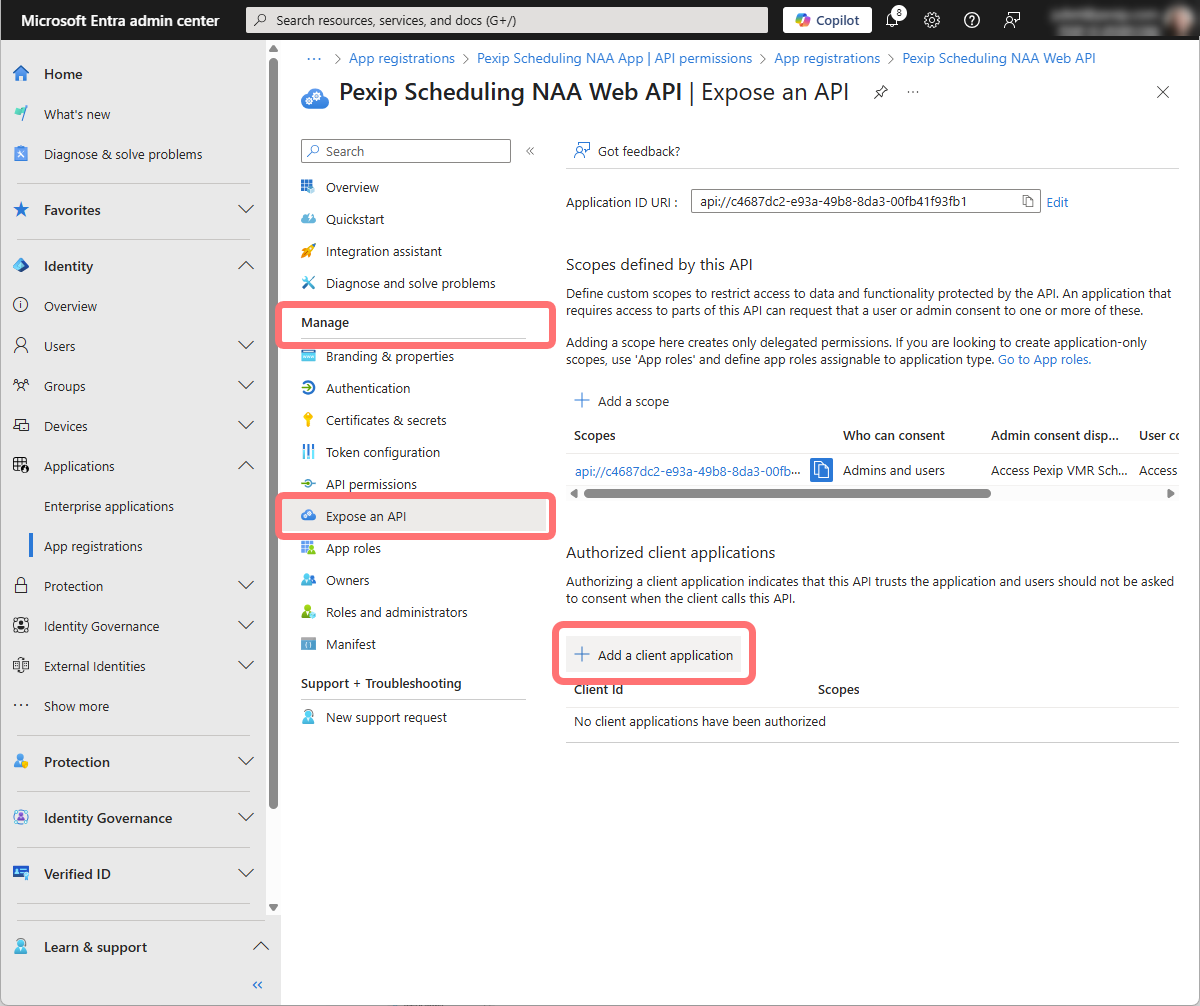
Pre-authorizing the NAA App to access the NAA Web API
This step is optional, but we recommend you do this to make the sign in flow for your users easier. Without this step, by default when users first use the add-in, they will be presented with two pop-ups requesting consent — one for the Pexip Scheduling NAA App (which also refers to the Access Pexip VMR Scheduling custom scope we created in the previous step), and one for the Pexip Scheduling NAA Web API.
To avoid users having to grant consent, pre-authorize the NAA app by telling it to trust the NAA Web API, as follows:
- Go to https://entra.microsoft.com/ and log in as an administrator.
-
From the left hand panel, select .
-
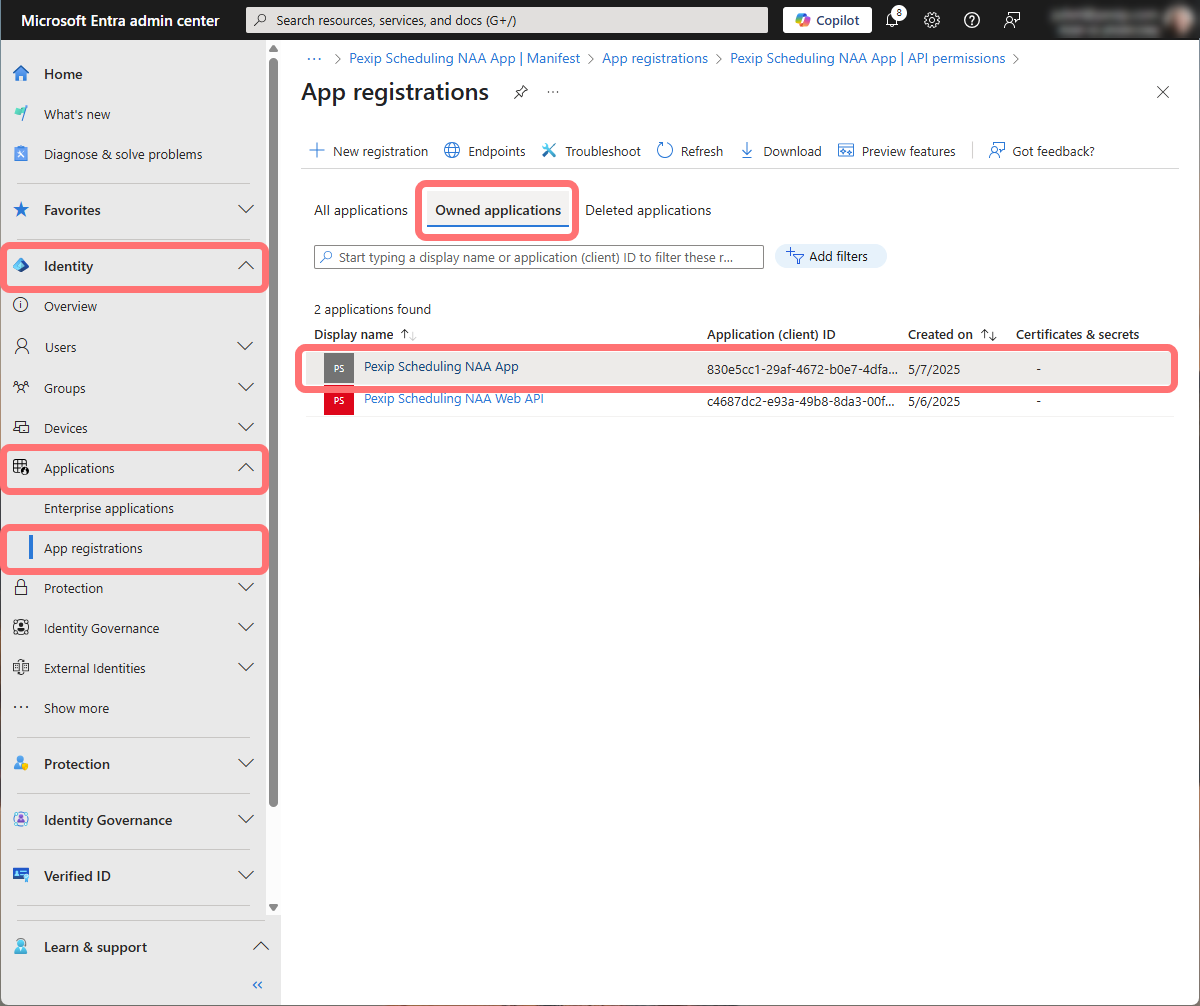
From the App registrations page, select the Owned applications tab. From the list of Apps, find the NAA App you created earlier. (In our example, this was named Pexip Scheduling NAA App):
Do not select the NAA Web API.
-
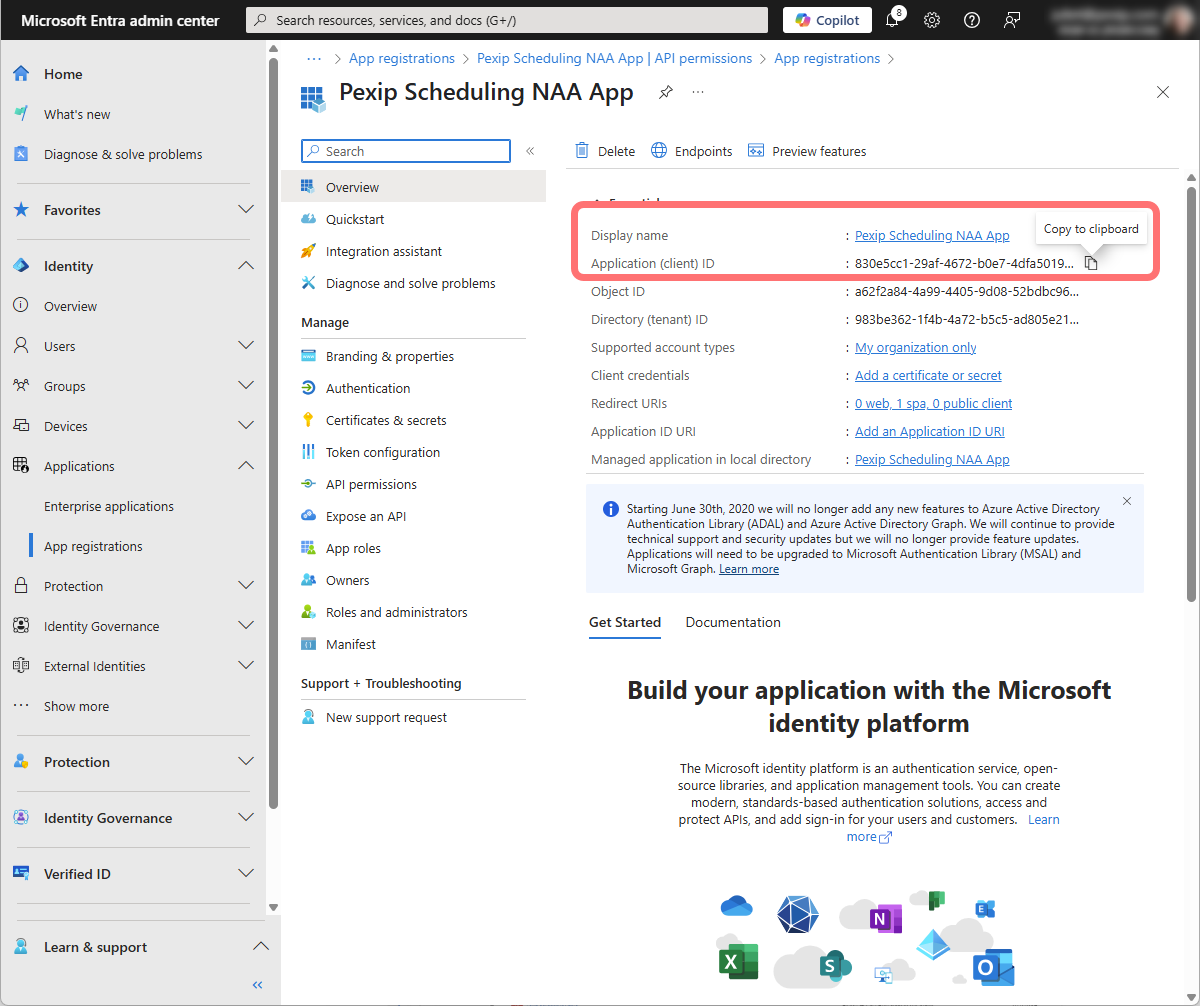
Copy the Application (client) ID:
-
Go back to the list of Owned applications and find the NAA Web API you created earlier.
Do not select the NAA App.
Select and select :
-
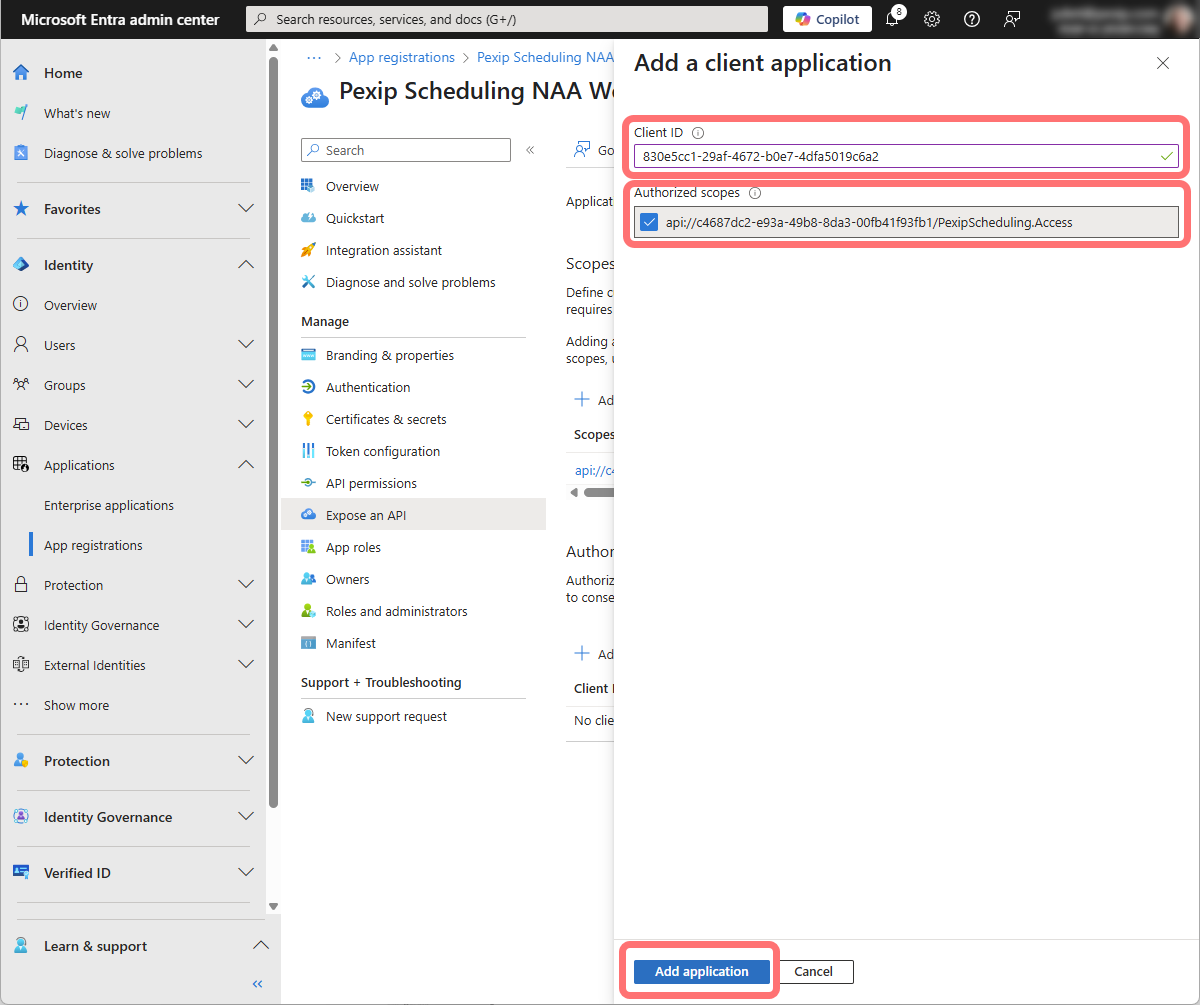
In the Add a client application pane, enter the following:
-
Client ID: paste the client ID of the NAA App you have just copied.
-
Authorized scopes: only one scope should be listed; this should end in PexipScheduling.Access; tick the checkbox next to this scope.
Select:
-
The configuration is now complete and you can leave the Microsoft Entra admin center.
Configuring Pexip Infinity
When configuring a Secure Scheduler for Exchange Integration on Pexip Infinity, select an Add-in authentication token type of NAA (Nested App Authentication) Token. Additional fields appear; enter the configuration from your new app registration in Microsoft Entra, as follows: